I visited an apparel factory that specializes in mass producing shirts for men. The process is divided into 8 general stages, which I’ve explained below:
Step 1: The Raw Material
The factory buys rolls of cloth that it then loads onto the machine shown below:

Step 2: Rough, Manual Cutting:
The roll of cloth is then roughly cut manually into smaller, more manageable pieces where individual parts of the shirt are then cut.

Step 3: Printing a template
Each of the parts of the shirt is outlined on a computer to scale. Multiple parts are then combined into one document that gets printed. They are combined on the computer in a way that maximizes the area covered by the parts, to ensure that as little cloth as possible gets wasted. The images below shows the preview on the computer and an industrial printer printing the template.


Step 4: Using the template on cloth to form the parts of the shirt:
Each of the templates is then attached on top of several sheets of cloth that were cut in Step 2 as shown below.

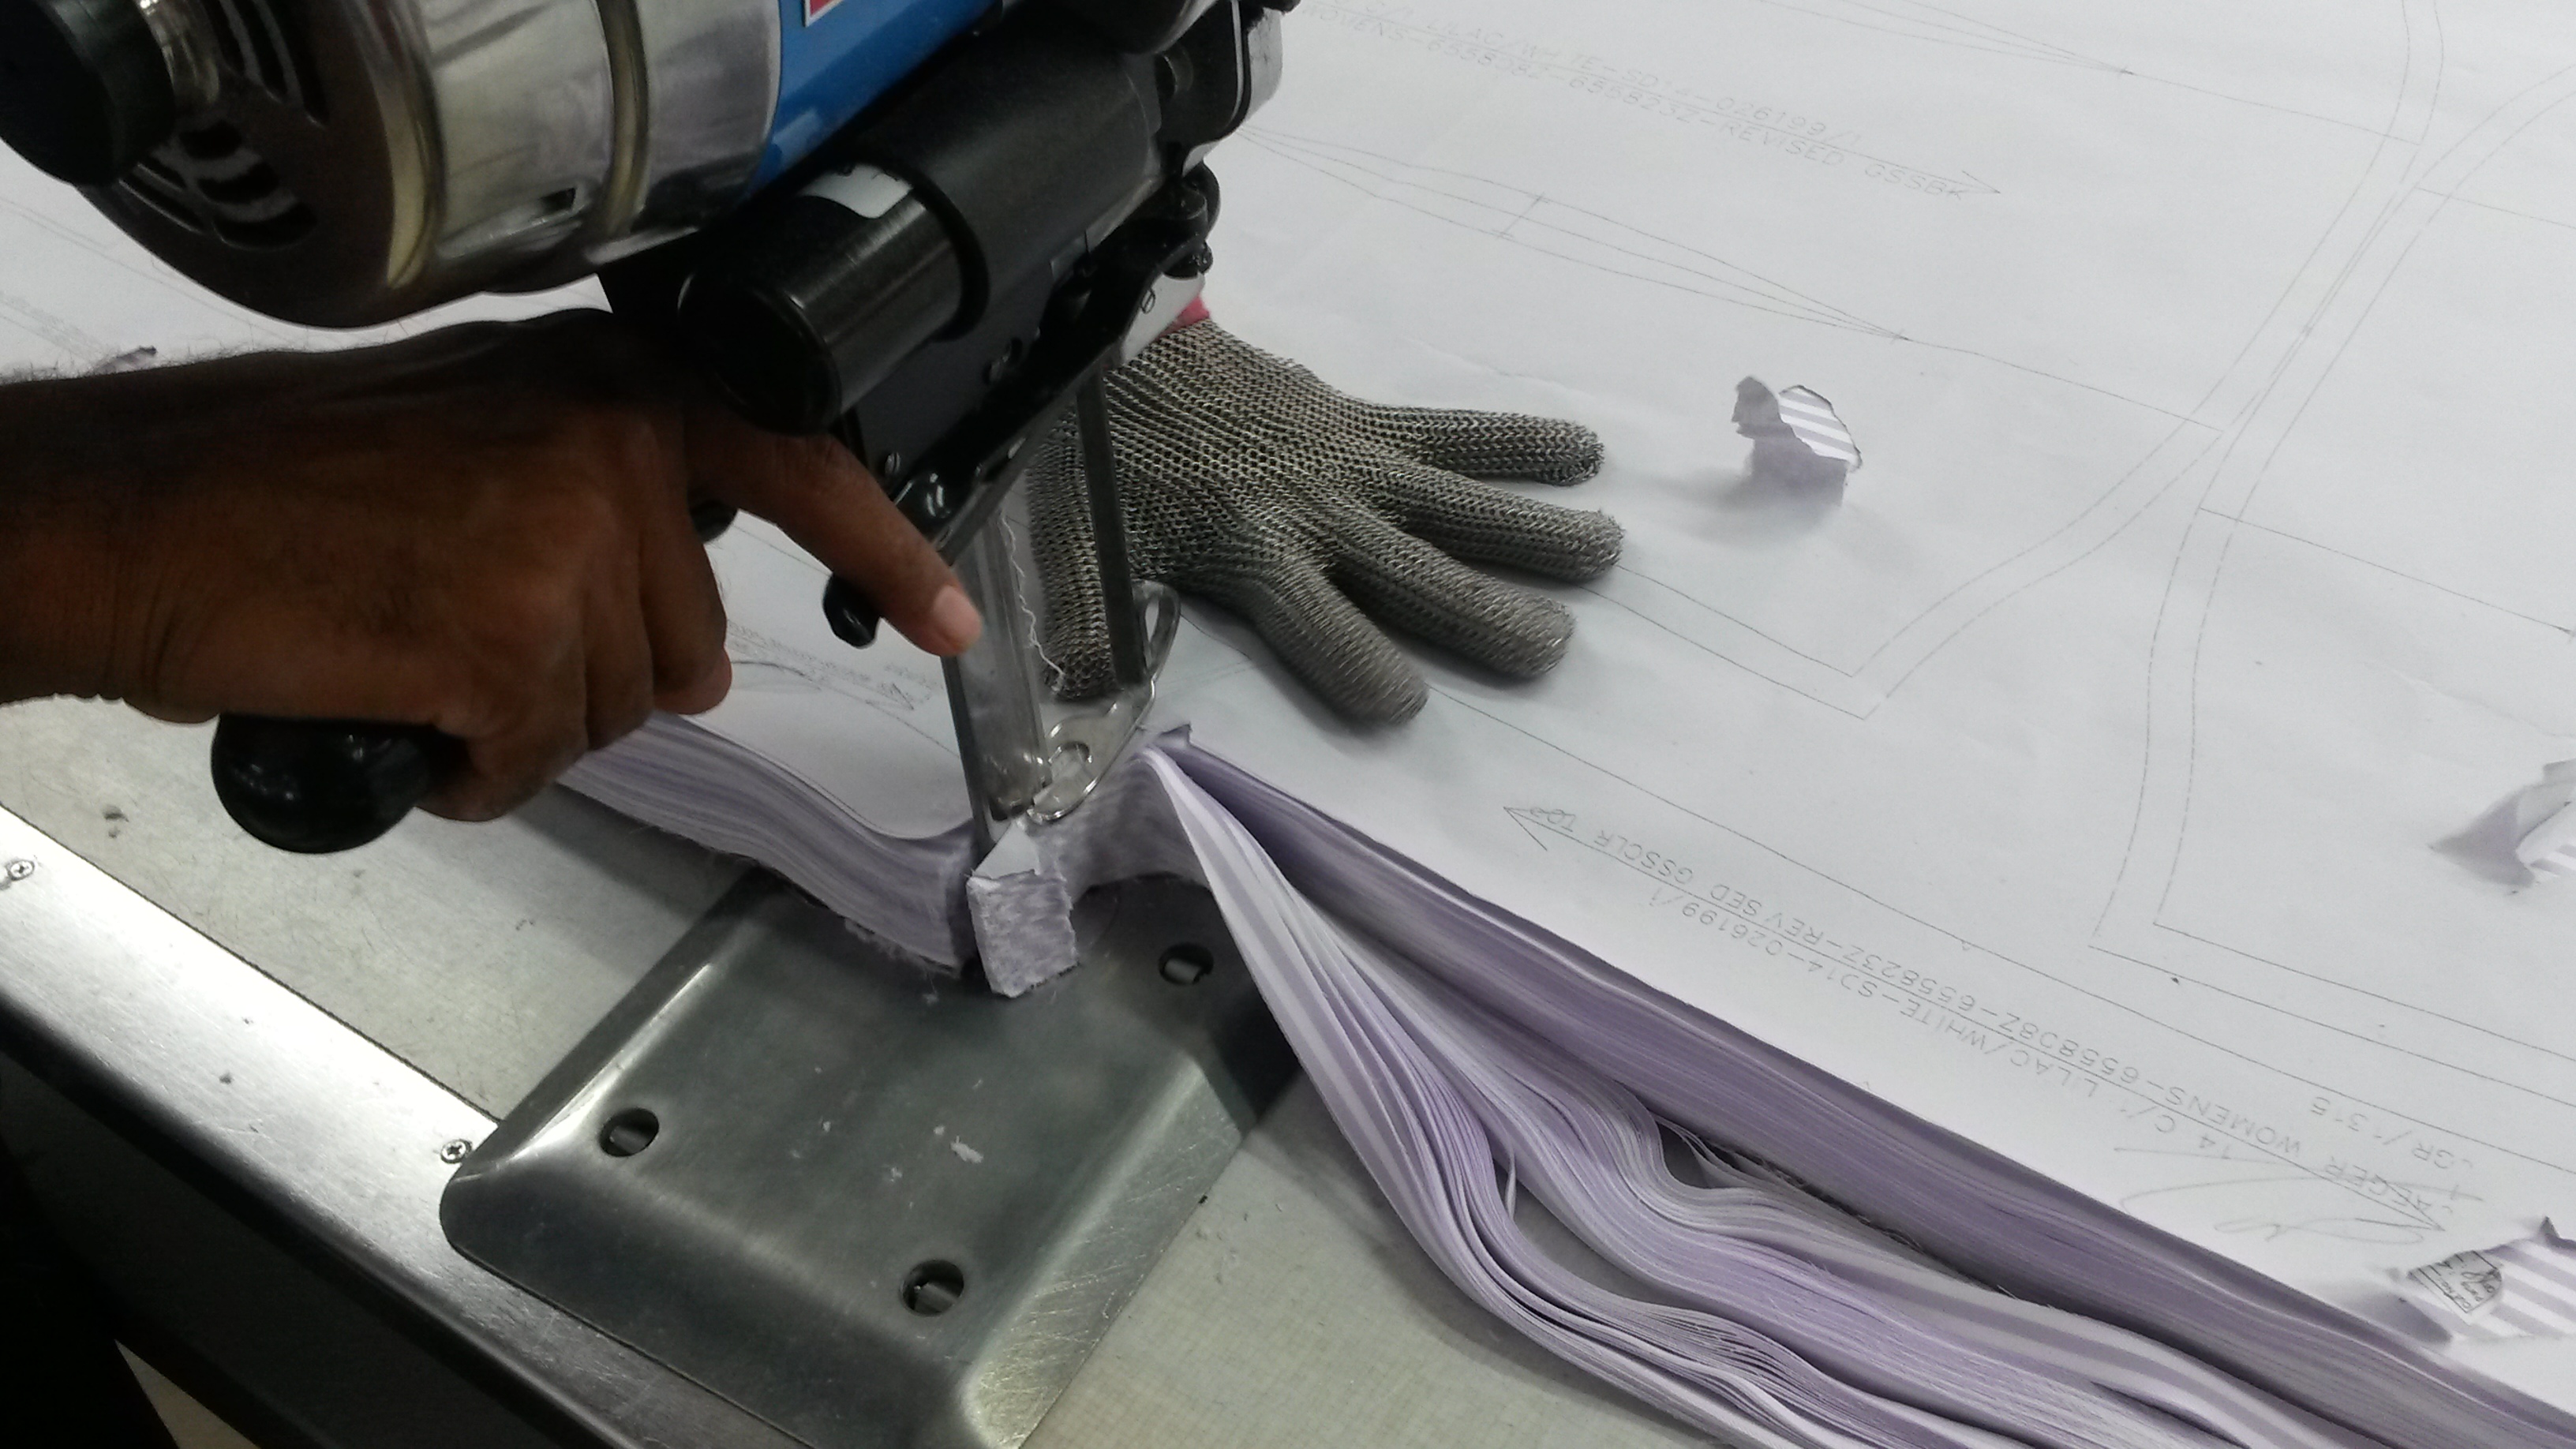
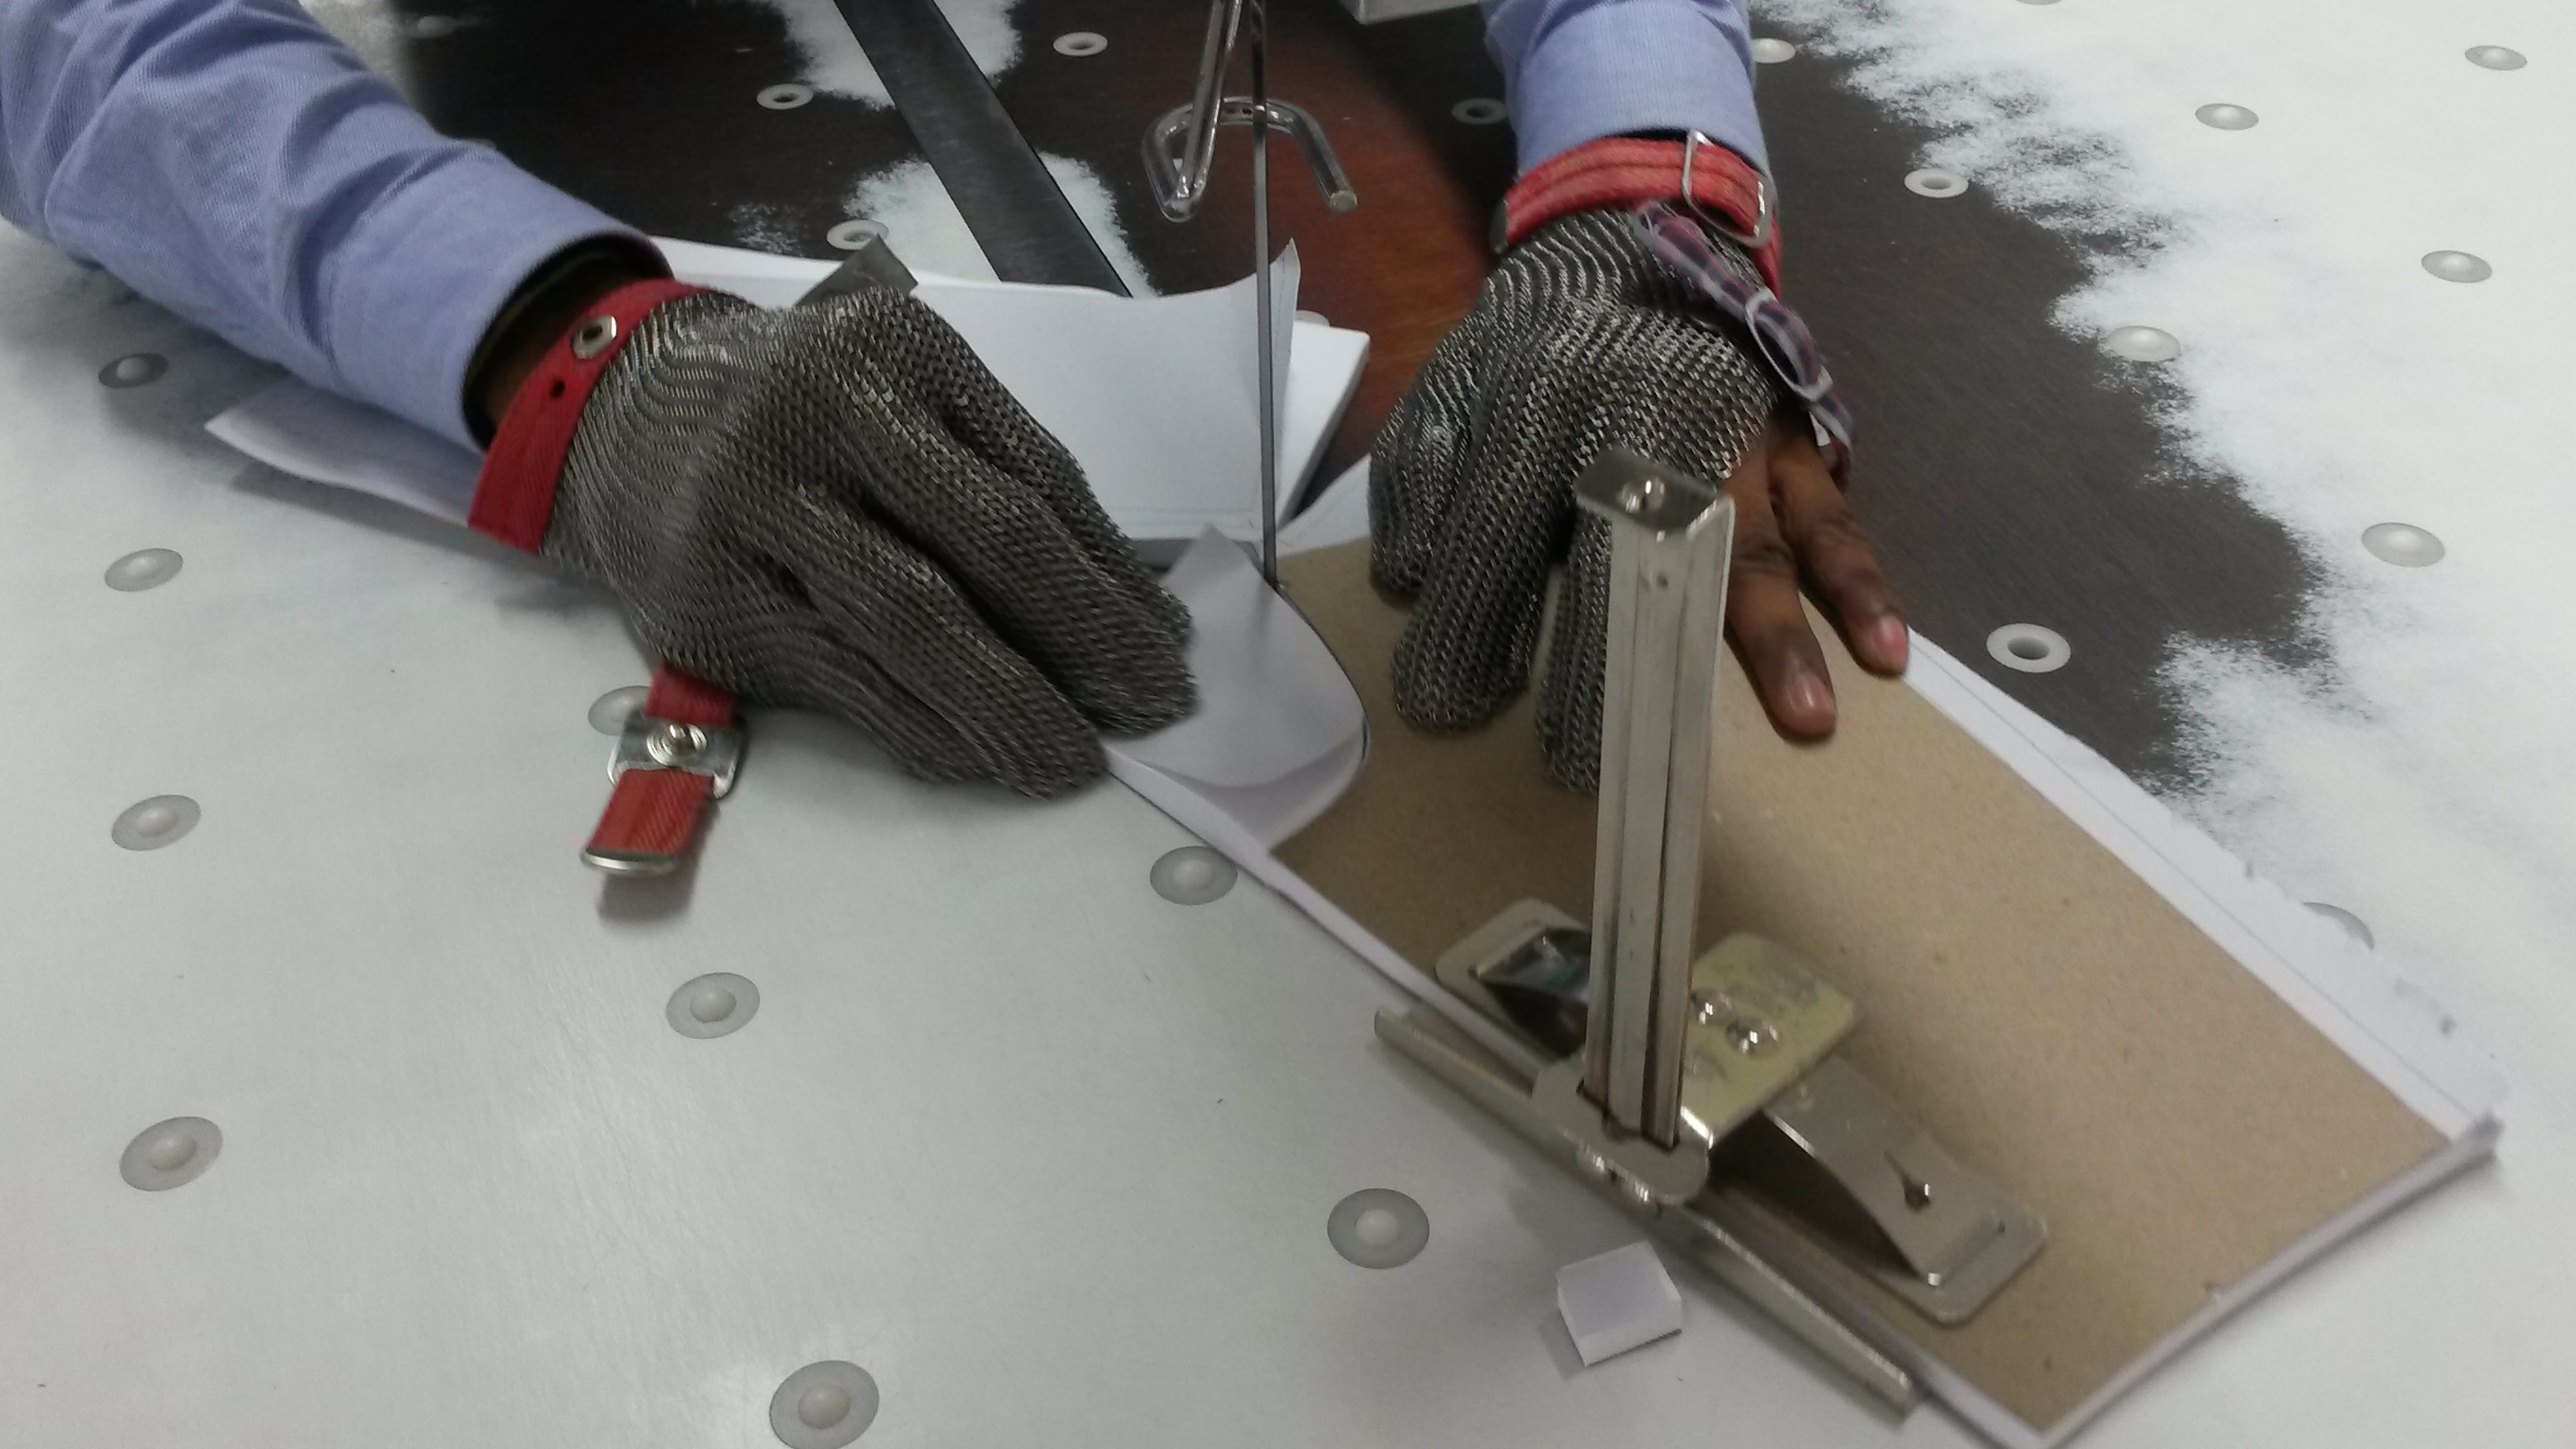
The pieces are then cut using electronic hand-cutters. These cutters come in two varieties:
a) A movable clamp and blade. Here, the cloth is not firmly clamped down by the machine and the worker must use his hand to firmly secure the cloth in place. However, the worker can move the cutter. This cutter is not precise as the worker can freely move the blade. It is therefore used to roughly and quickly cut around the lines of bigger pieces as the image below shows.
b) A fixed clamp and blade. Here, instead of moving the blade the worker moves the clamped cloth into a blade that runs continuously. This is used for more precise operations with the assistance of a cardboard piece cut out in the same shape as the part that needs to be cut as shown below.
With the help of both of these cutters (each for operations with different levels of precision), multiple copies of the parts of the shirt are cut.
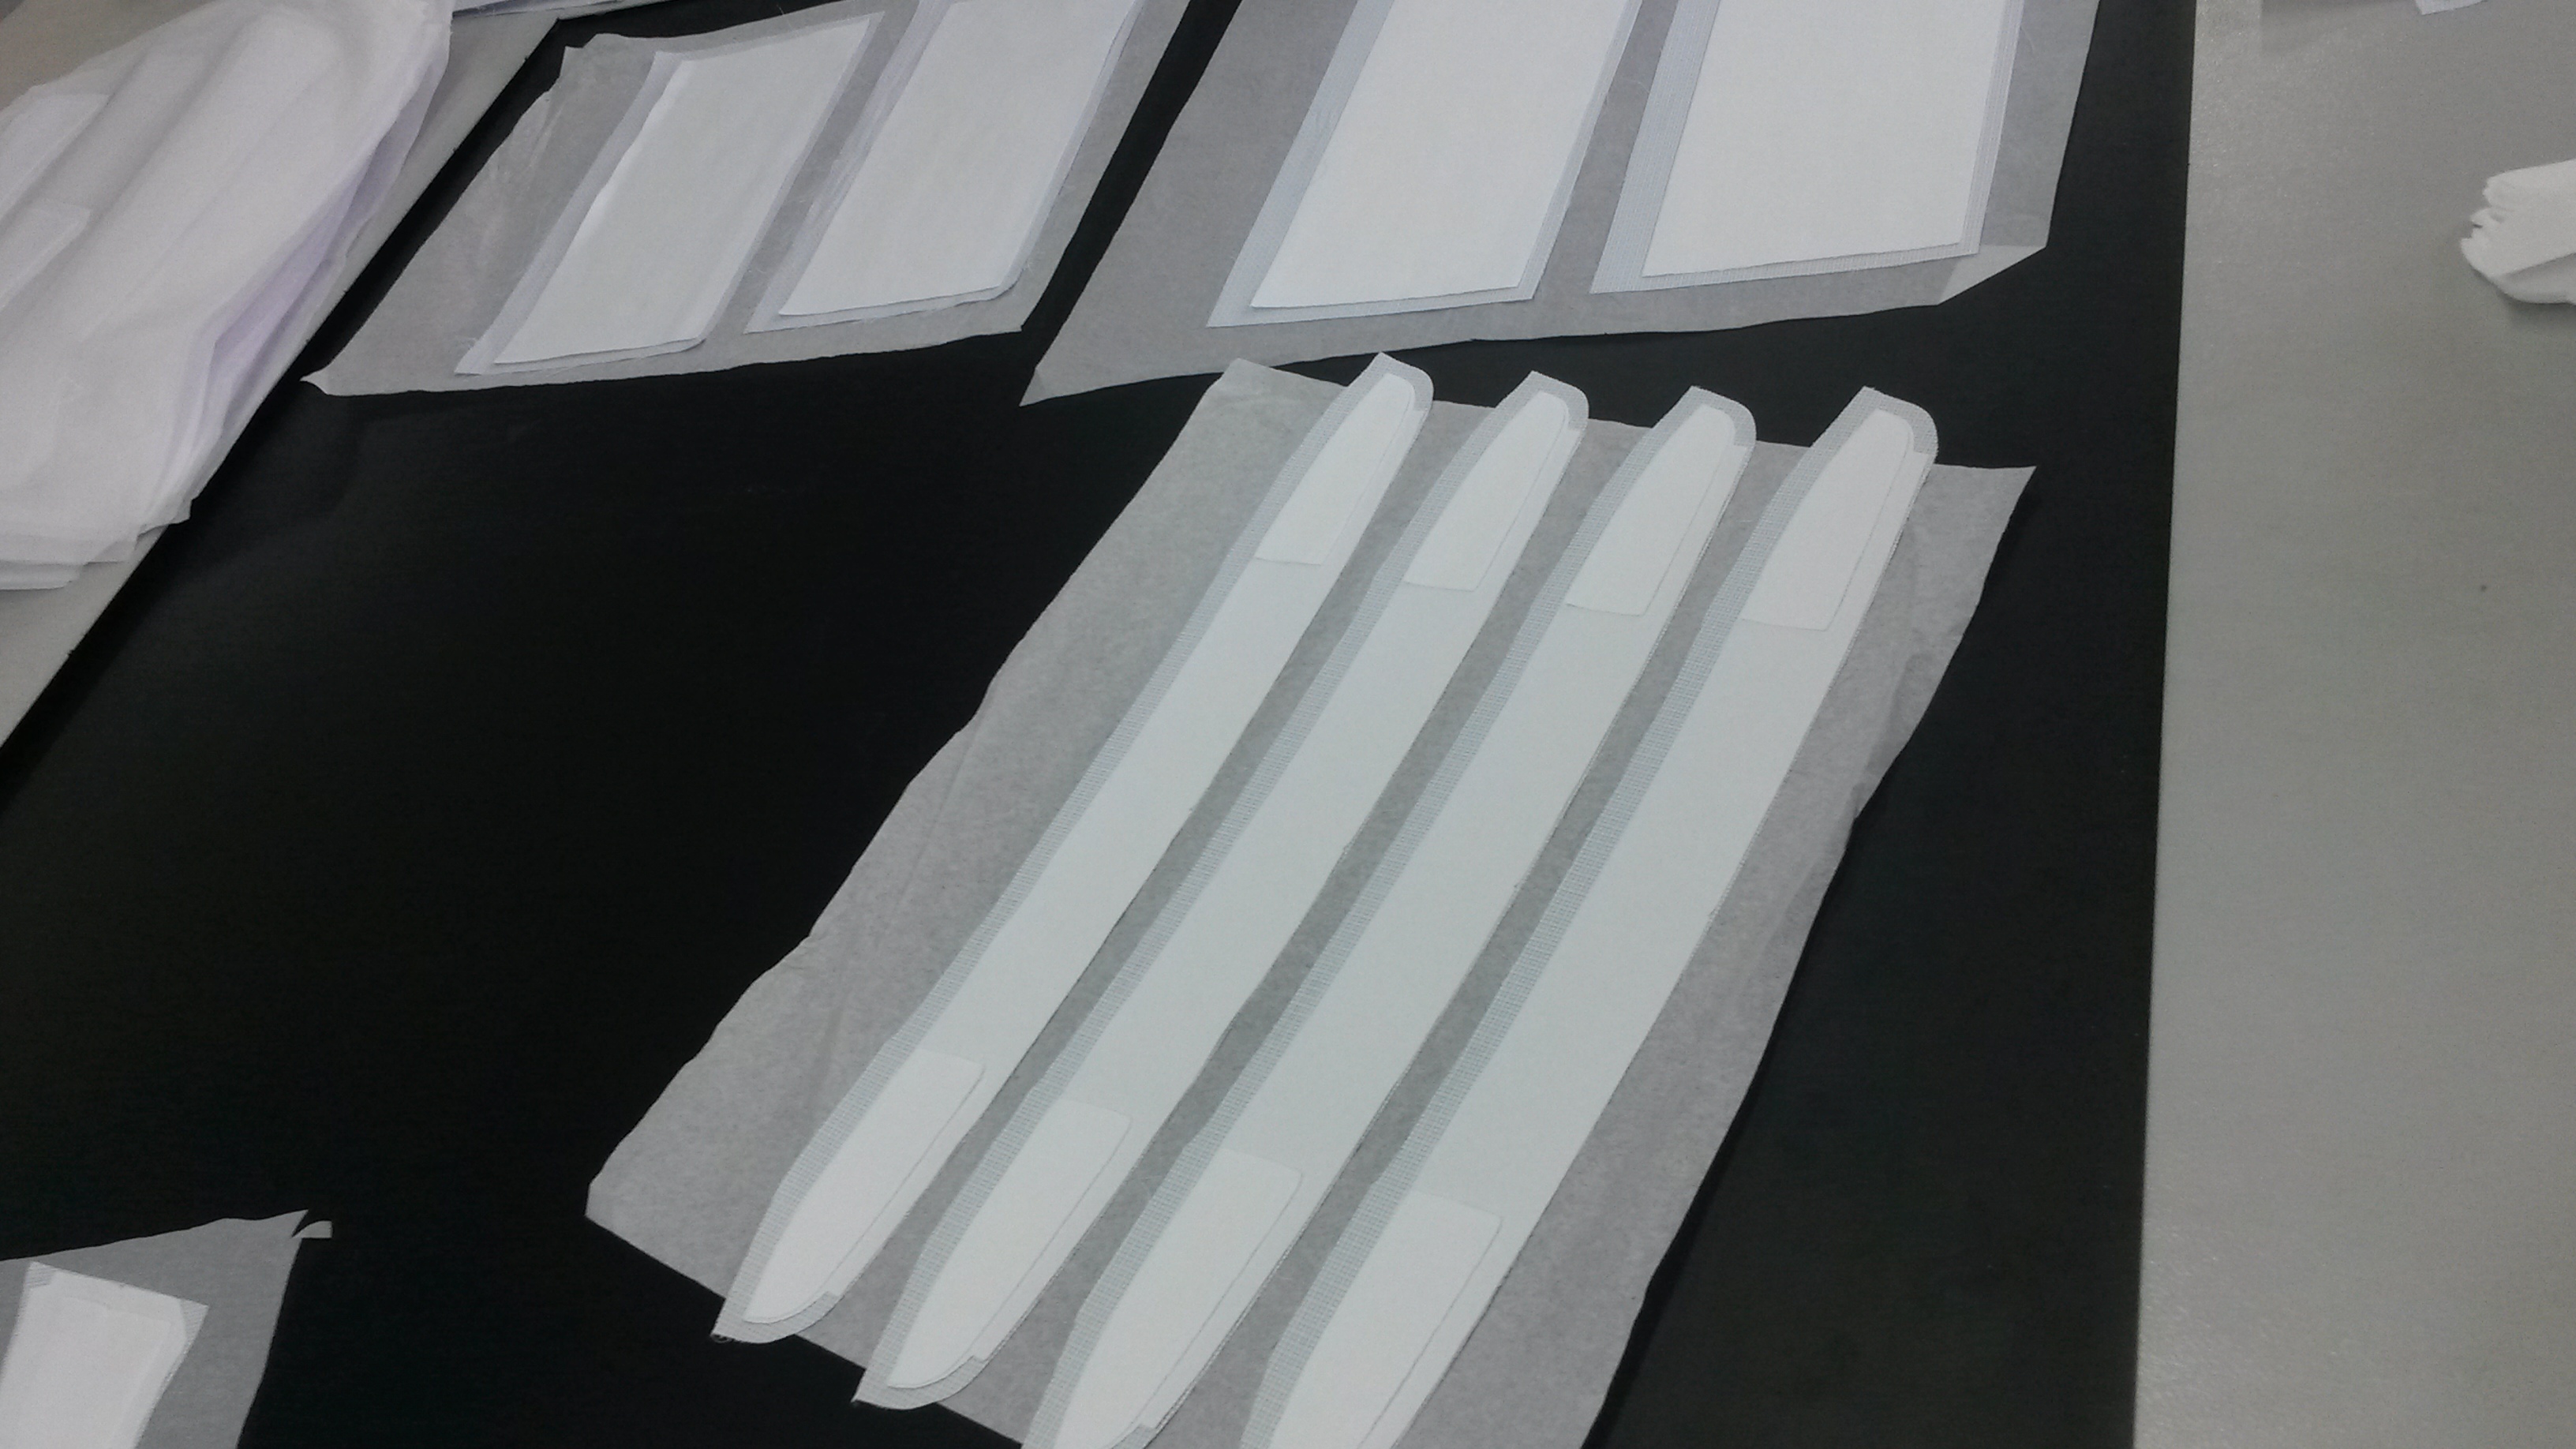
Step 4: Making some parts firmer:
You might have noticed the collar, end of the sleeve and front (where the buttons are) of formal shirts are stiffer than the rest of the shirt in order to prevent wrinkles and give the shirt a more defined shape. This is enabled by combining several pieces of the thin cloth into one thicker piece. Pieces of the cloth are layered on top of each other above a special, heat-resistant paper and sent through a heater.
The heater is set to a particular temperature so that the pieces of cloth melt very, very slightly to bind together. The cloth is not directly placed on the rubber as it would stick to the smooth surface of the rubber. The paper, however, has a rough texture, which means its surface is uneven- this prevents the cloth from sticking to it. Additionally, the paper has a much higher melting point and does not melt even slightly which further prevents it from sticking to the cloth.
The layers are bound together using a heater to create the firmness that some parts of the shirt require.
Step 5: Stitching the intricate parts
The intricate parts, such as the brand logo is stitched by an automated computer-numerically controlled (CNC) machine. Code is fed into the machine which instructs it to move a particular distance, stay there for a particular amount of time while using one of the input threads. A code is set of each of the brands the company makes shirts for.
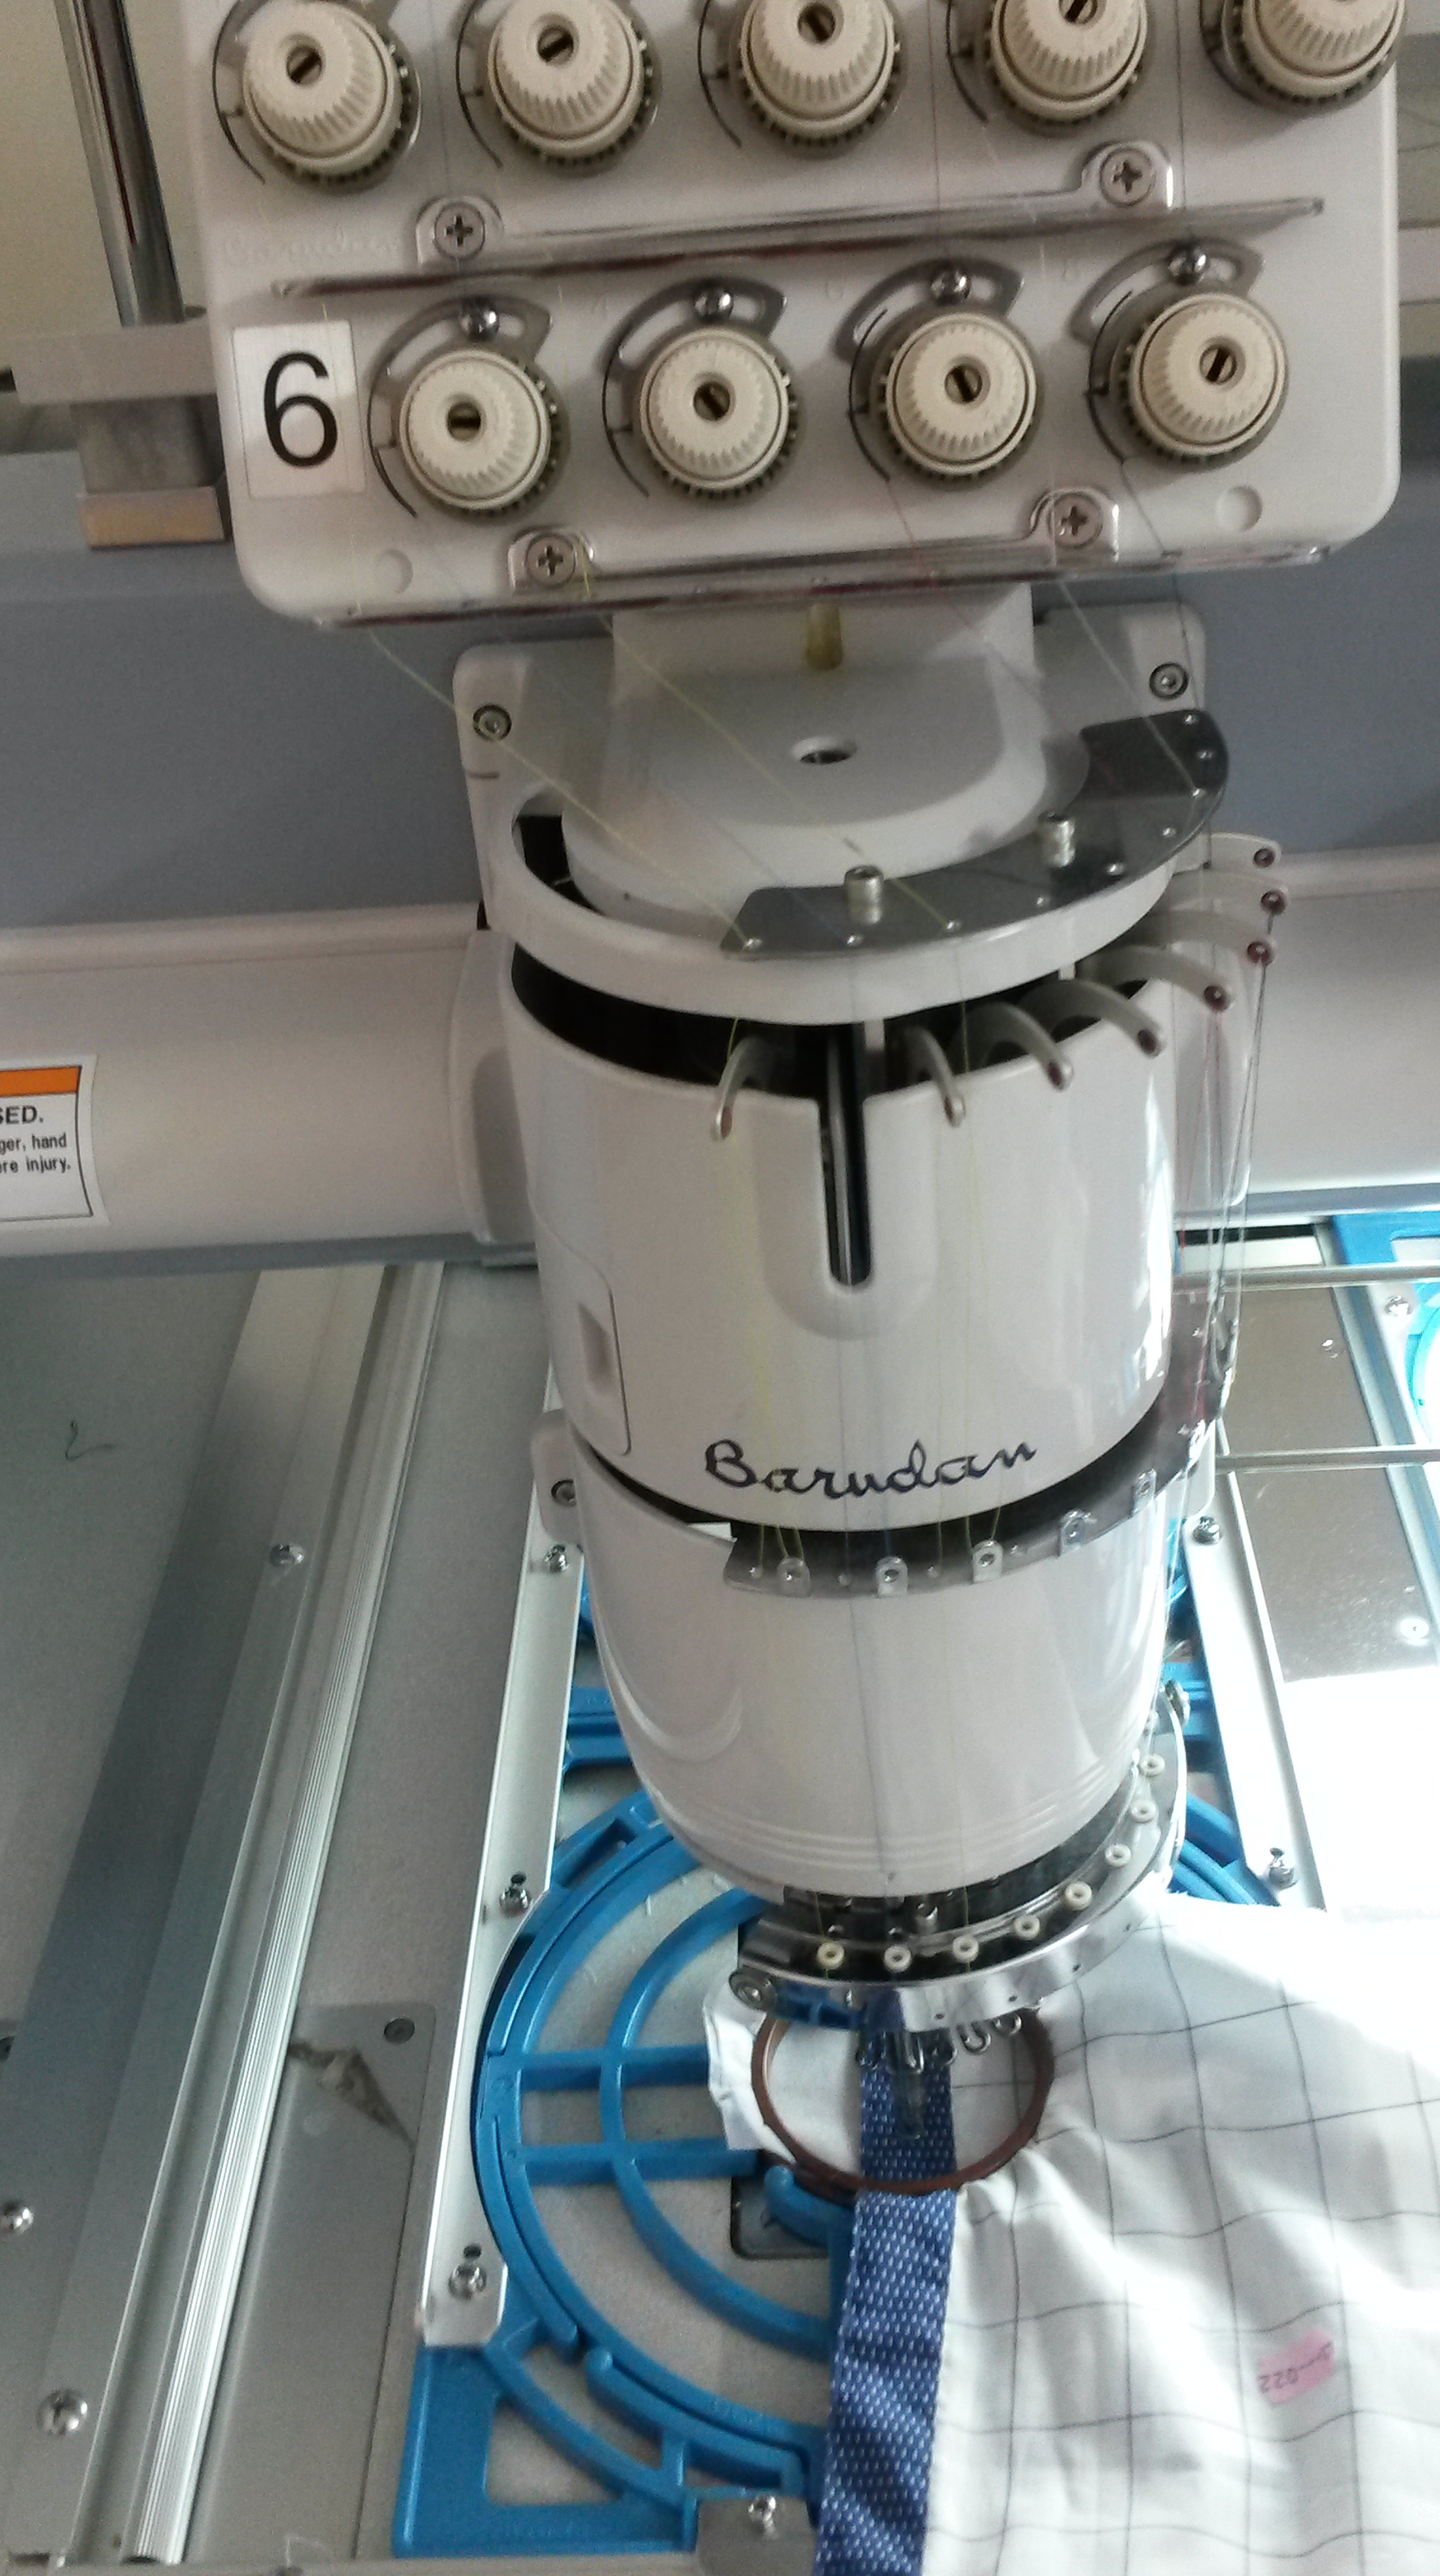
The bottom of the CNC is an automated sewing machine with takes the input on thread and continuously stitches it on the cloth.
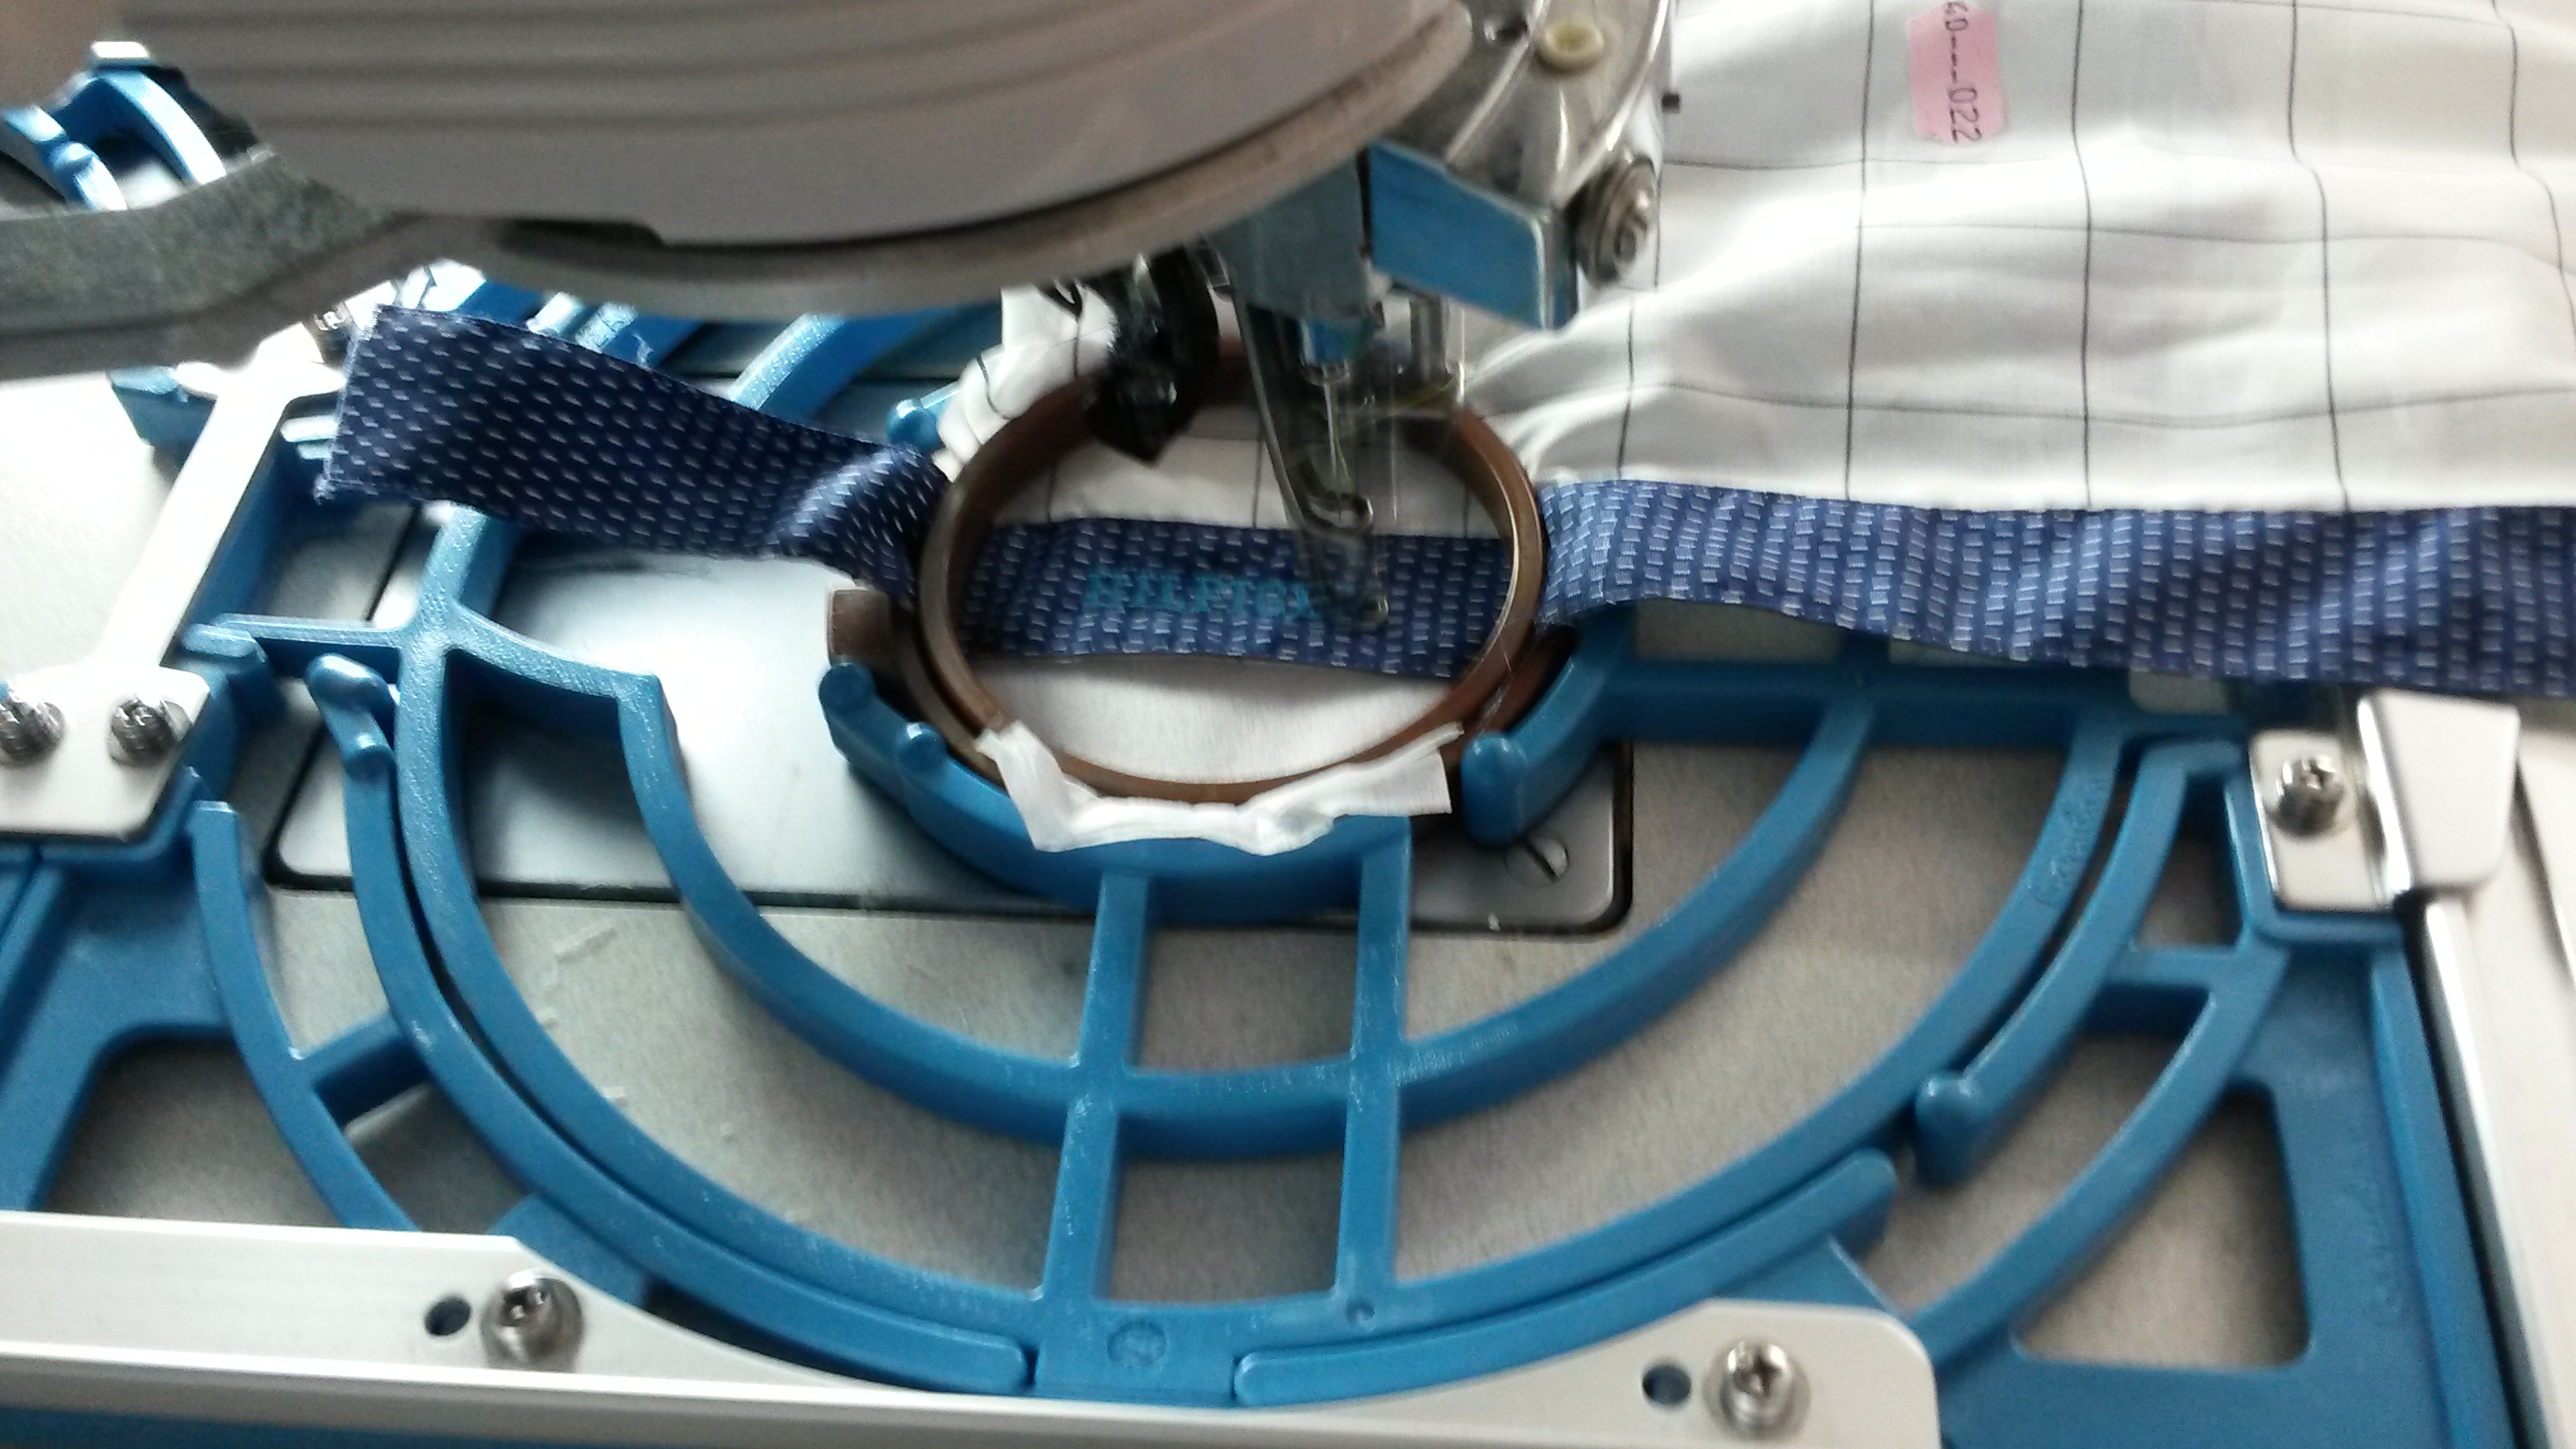
This is not done by hand, as it would not be as precise or as quick.
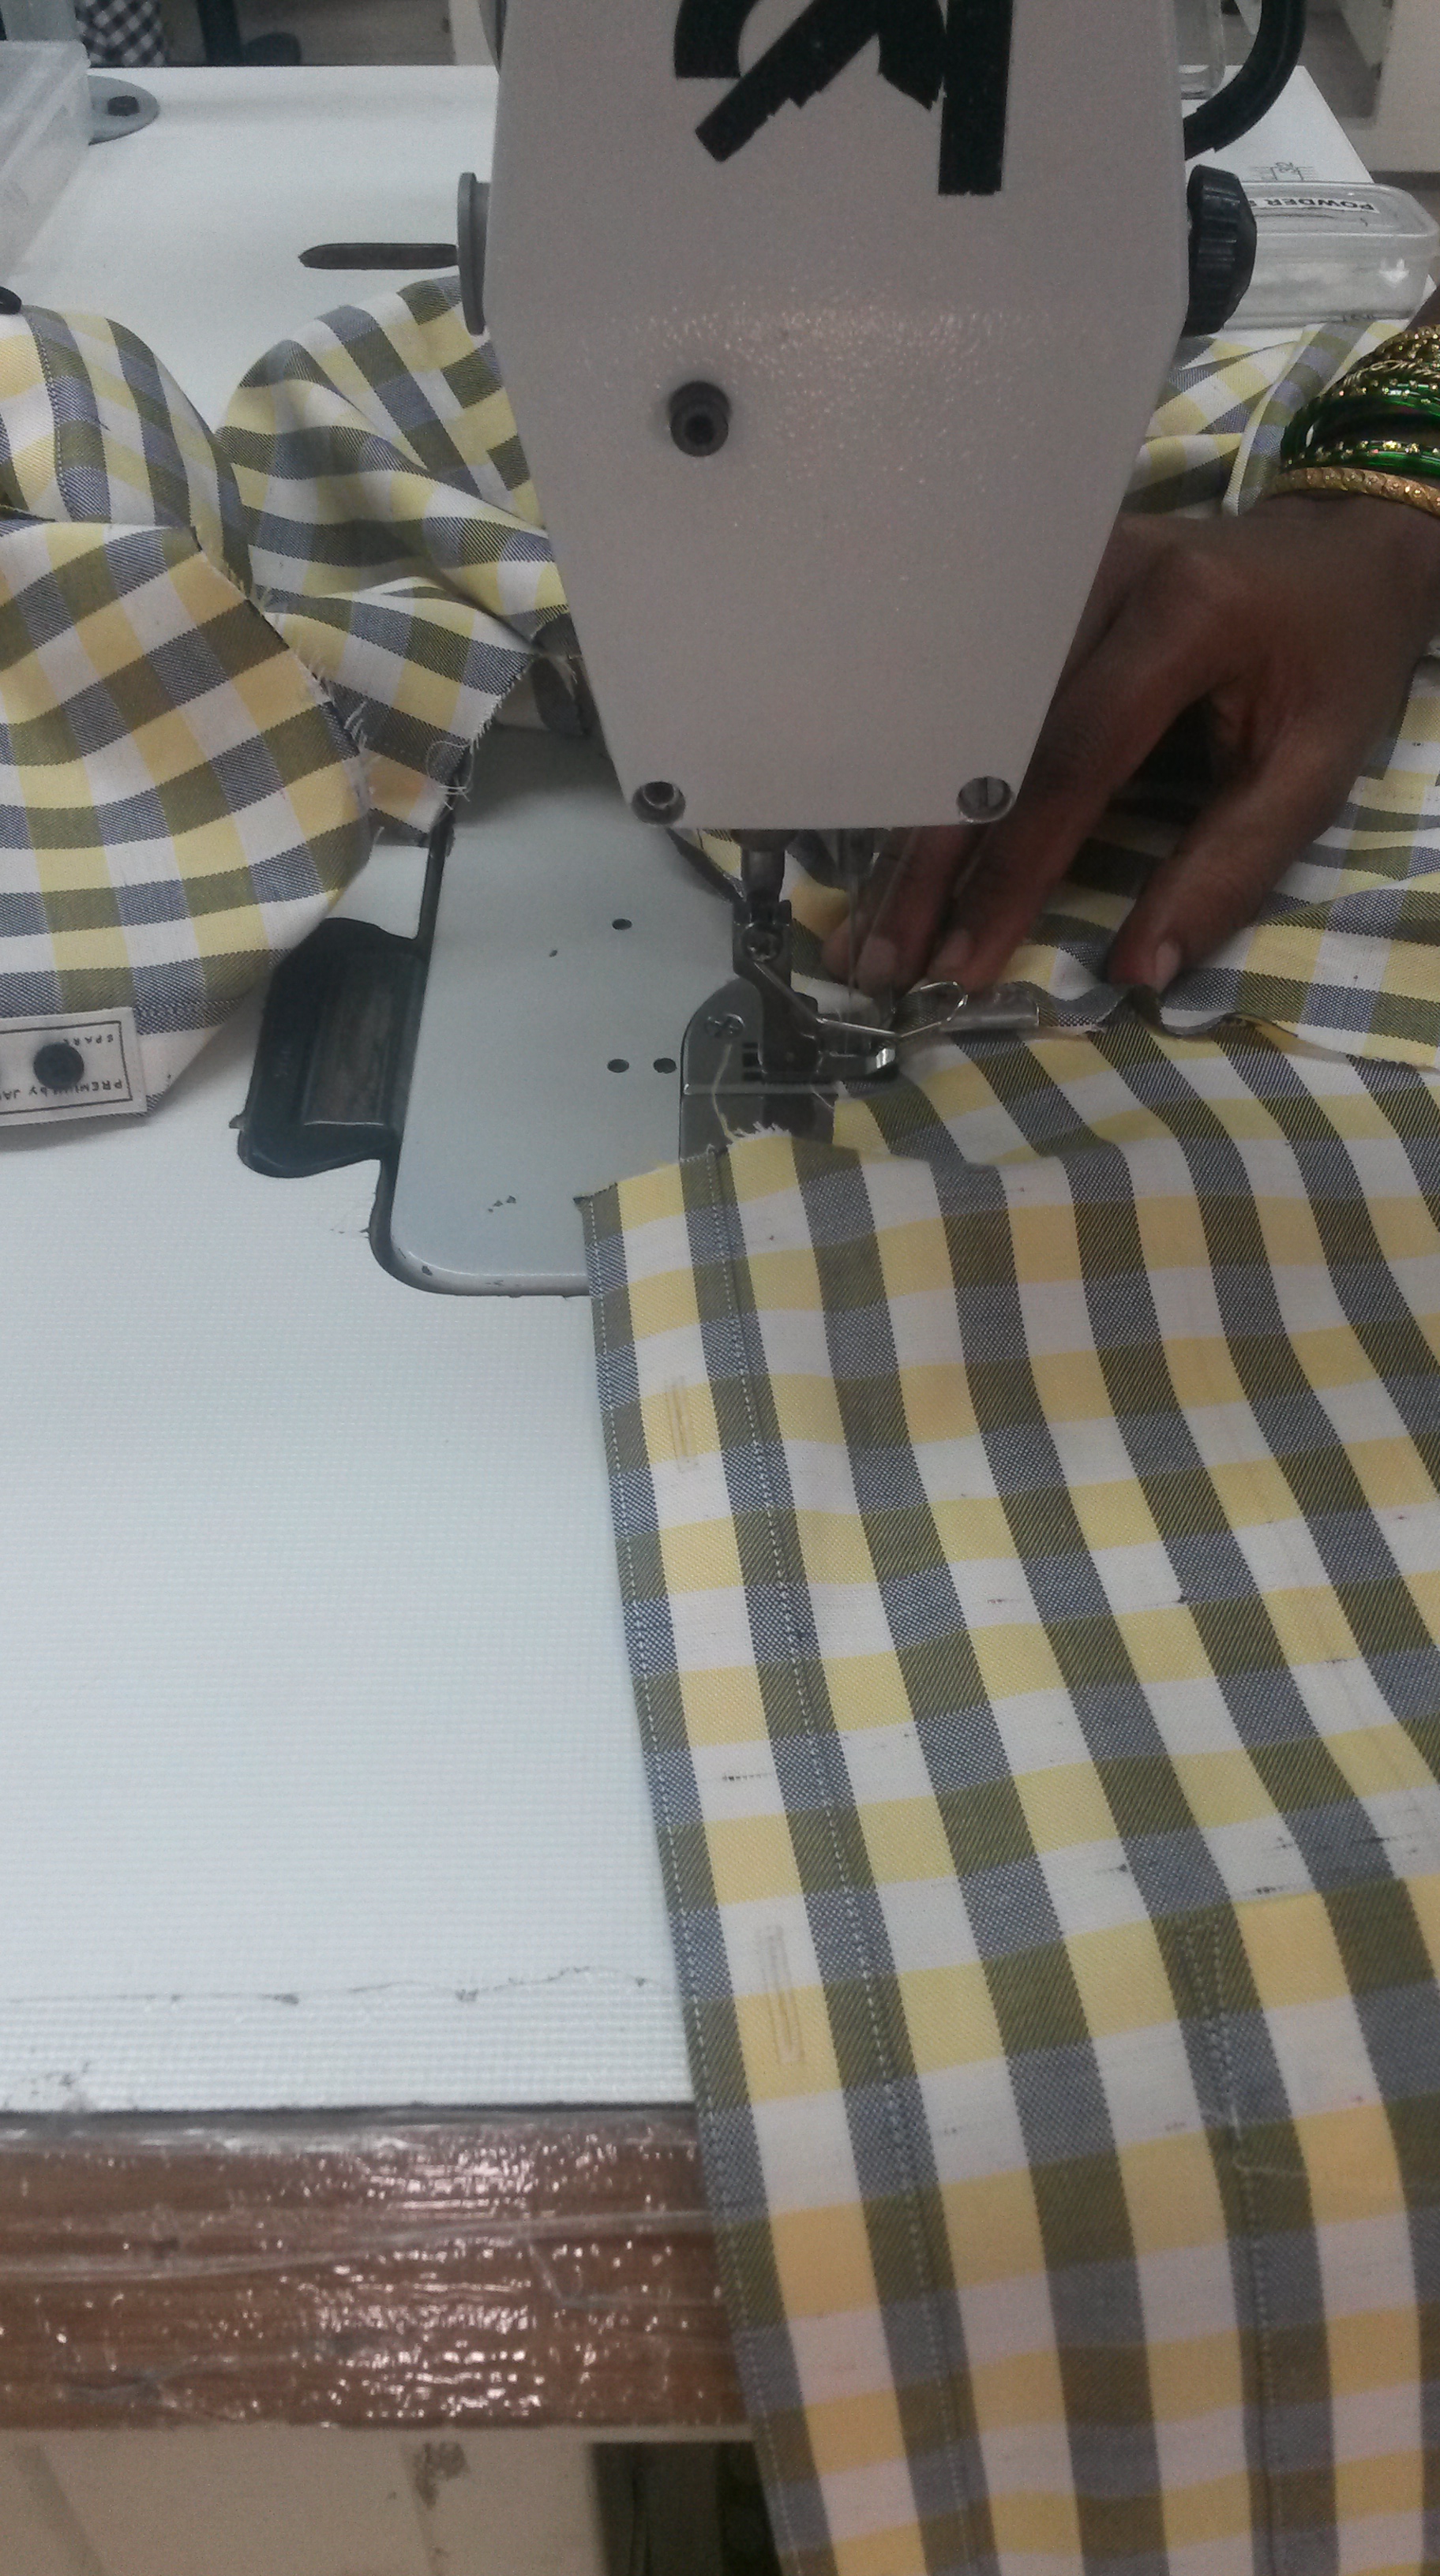
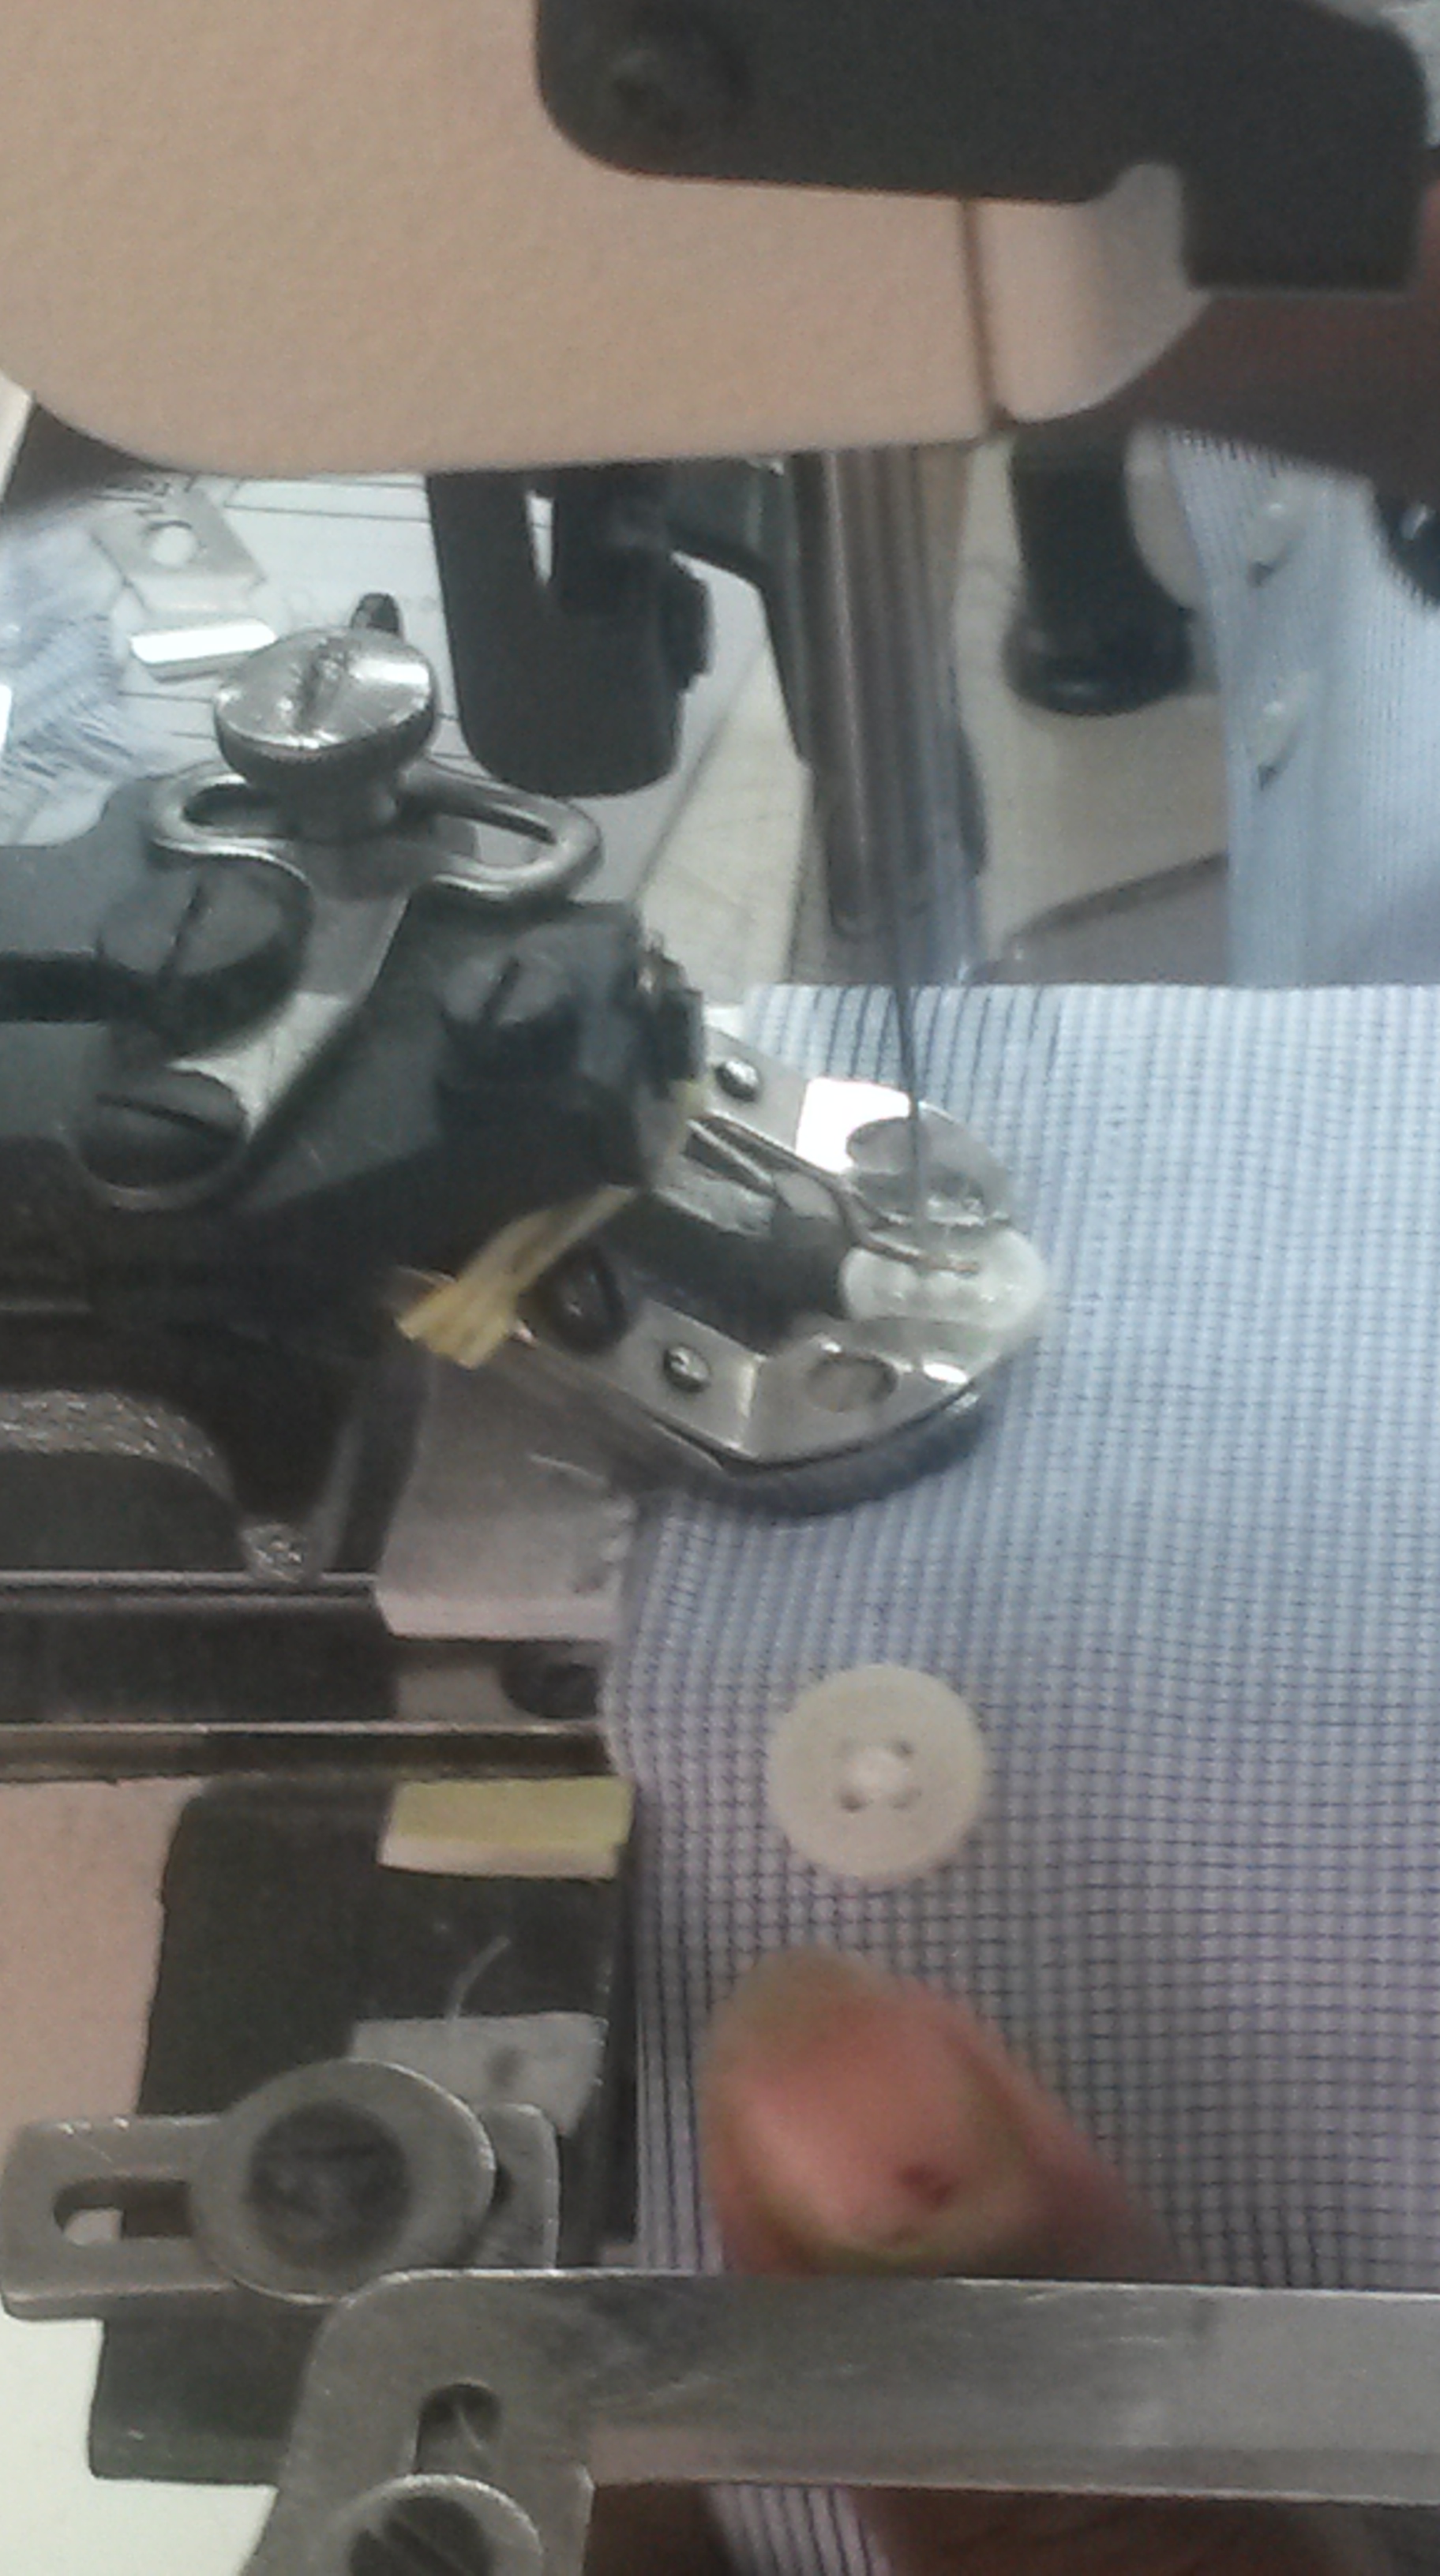
Step 6: Stitching the parts together:
Each of the parts (some made firmer, some with the brand name stitched), are brought into an assembly line, with an additional part being added on in each row.

Semi-automatic sewing machines are used throughout the process by operators to stitch the parts together and add components, such as buttons. The images below show this in action.
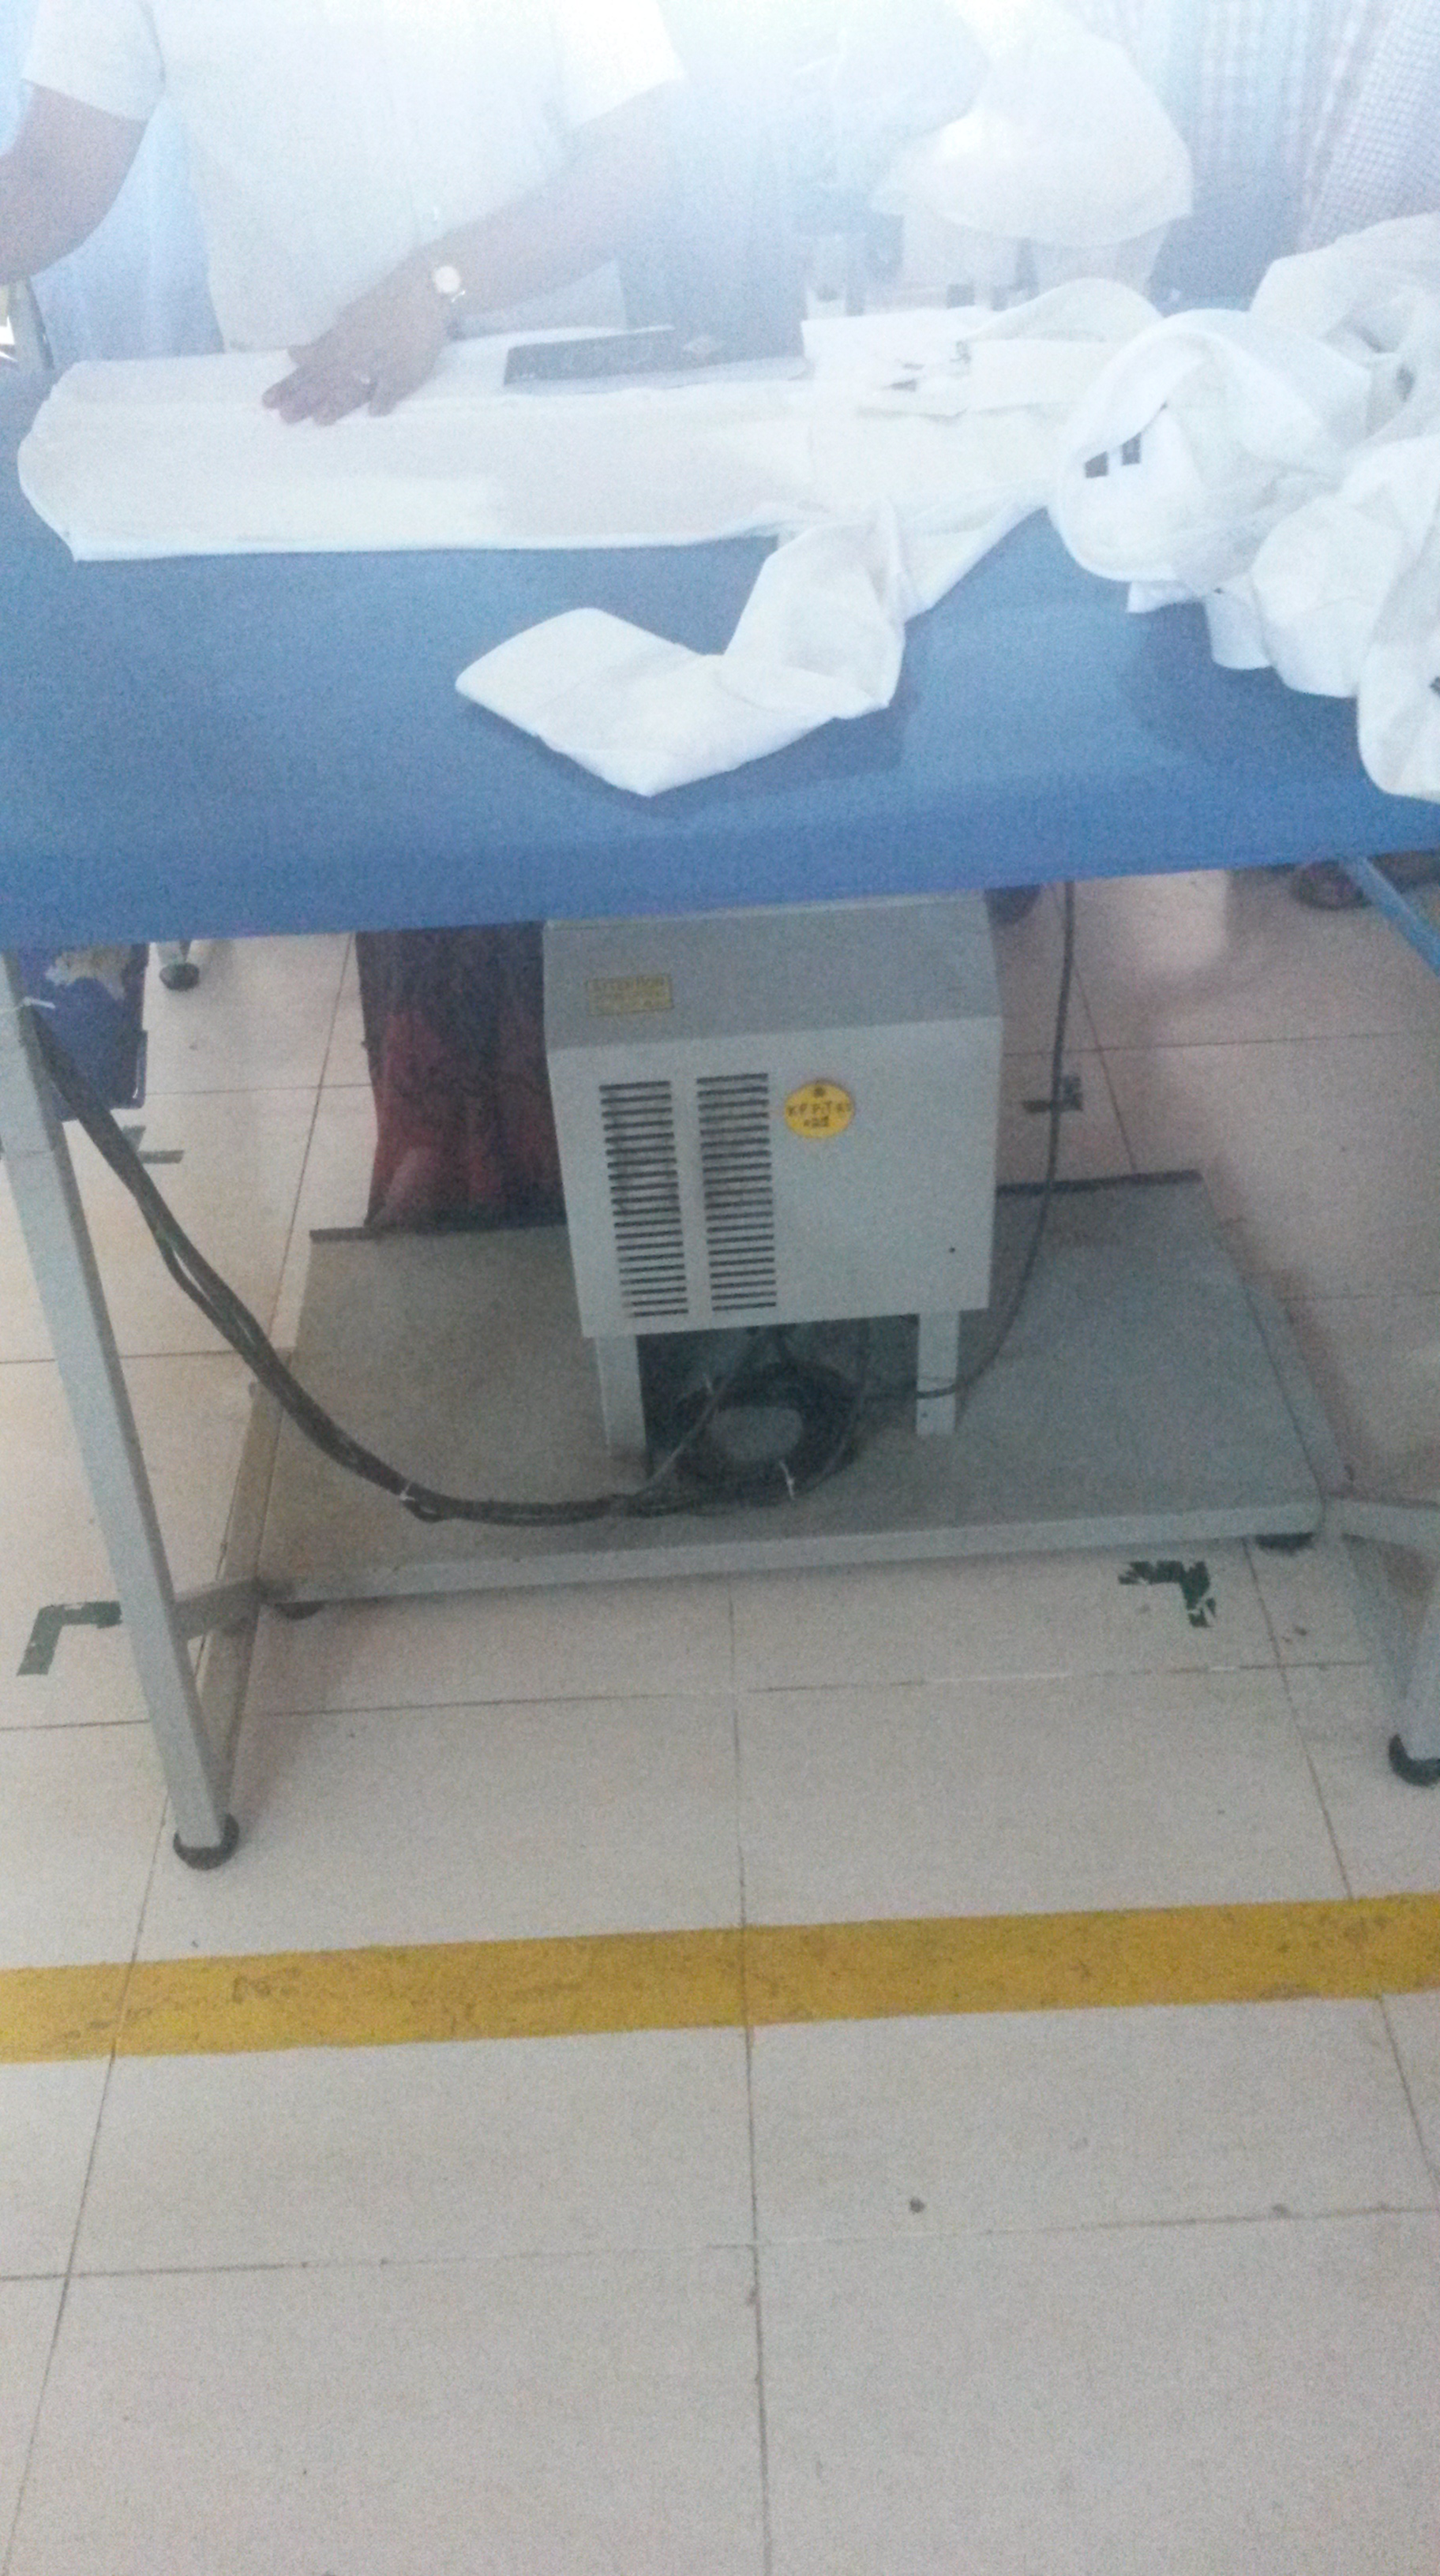
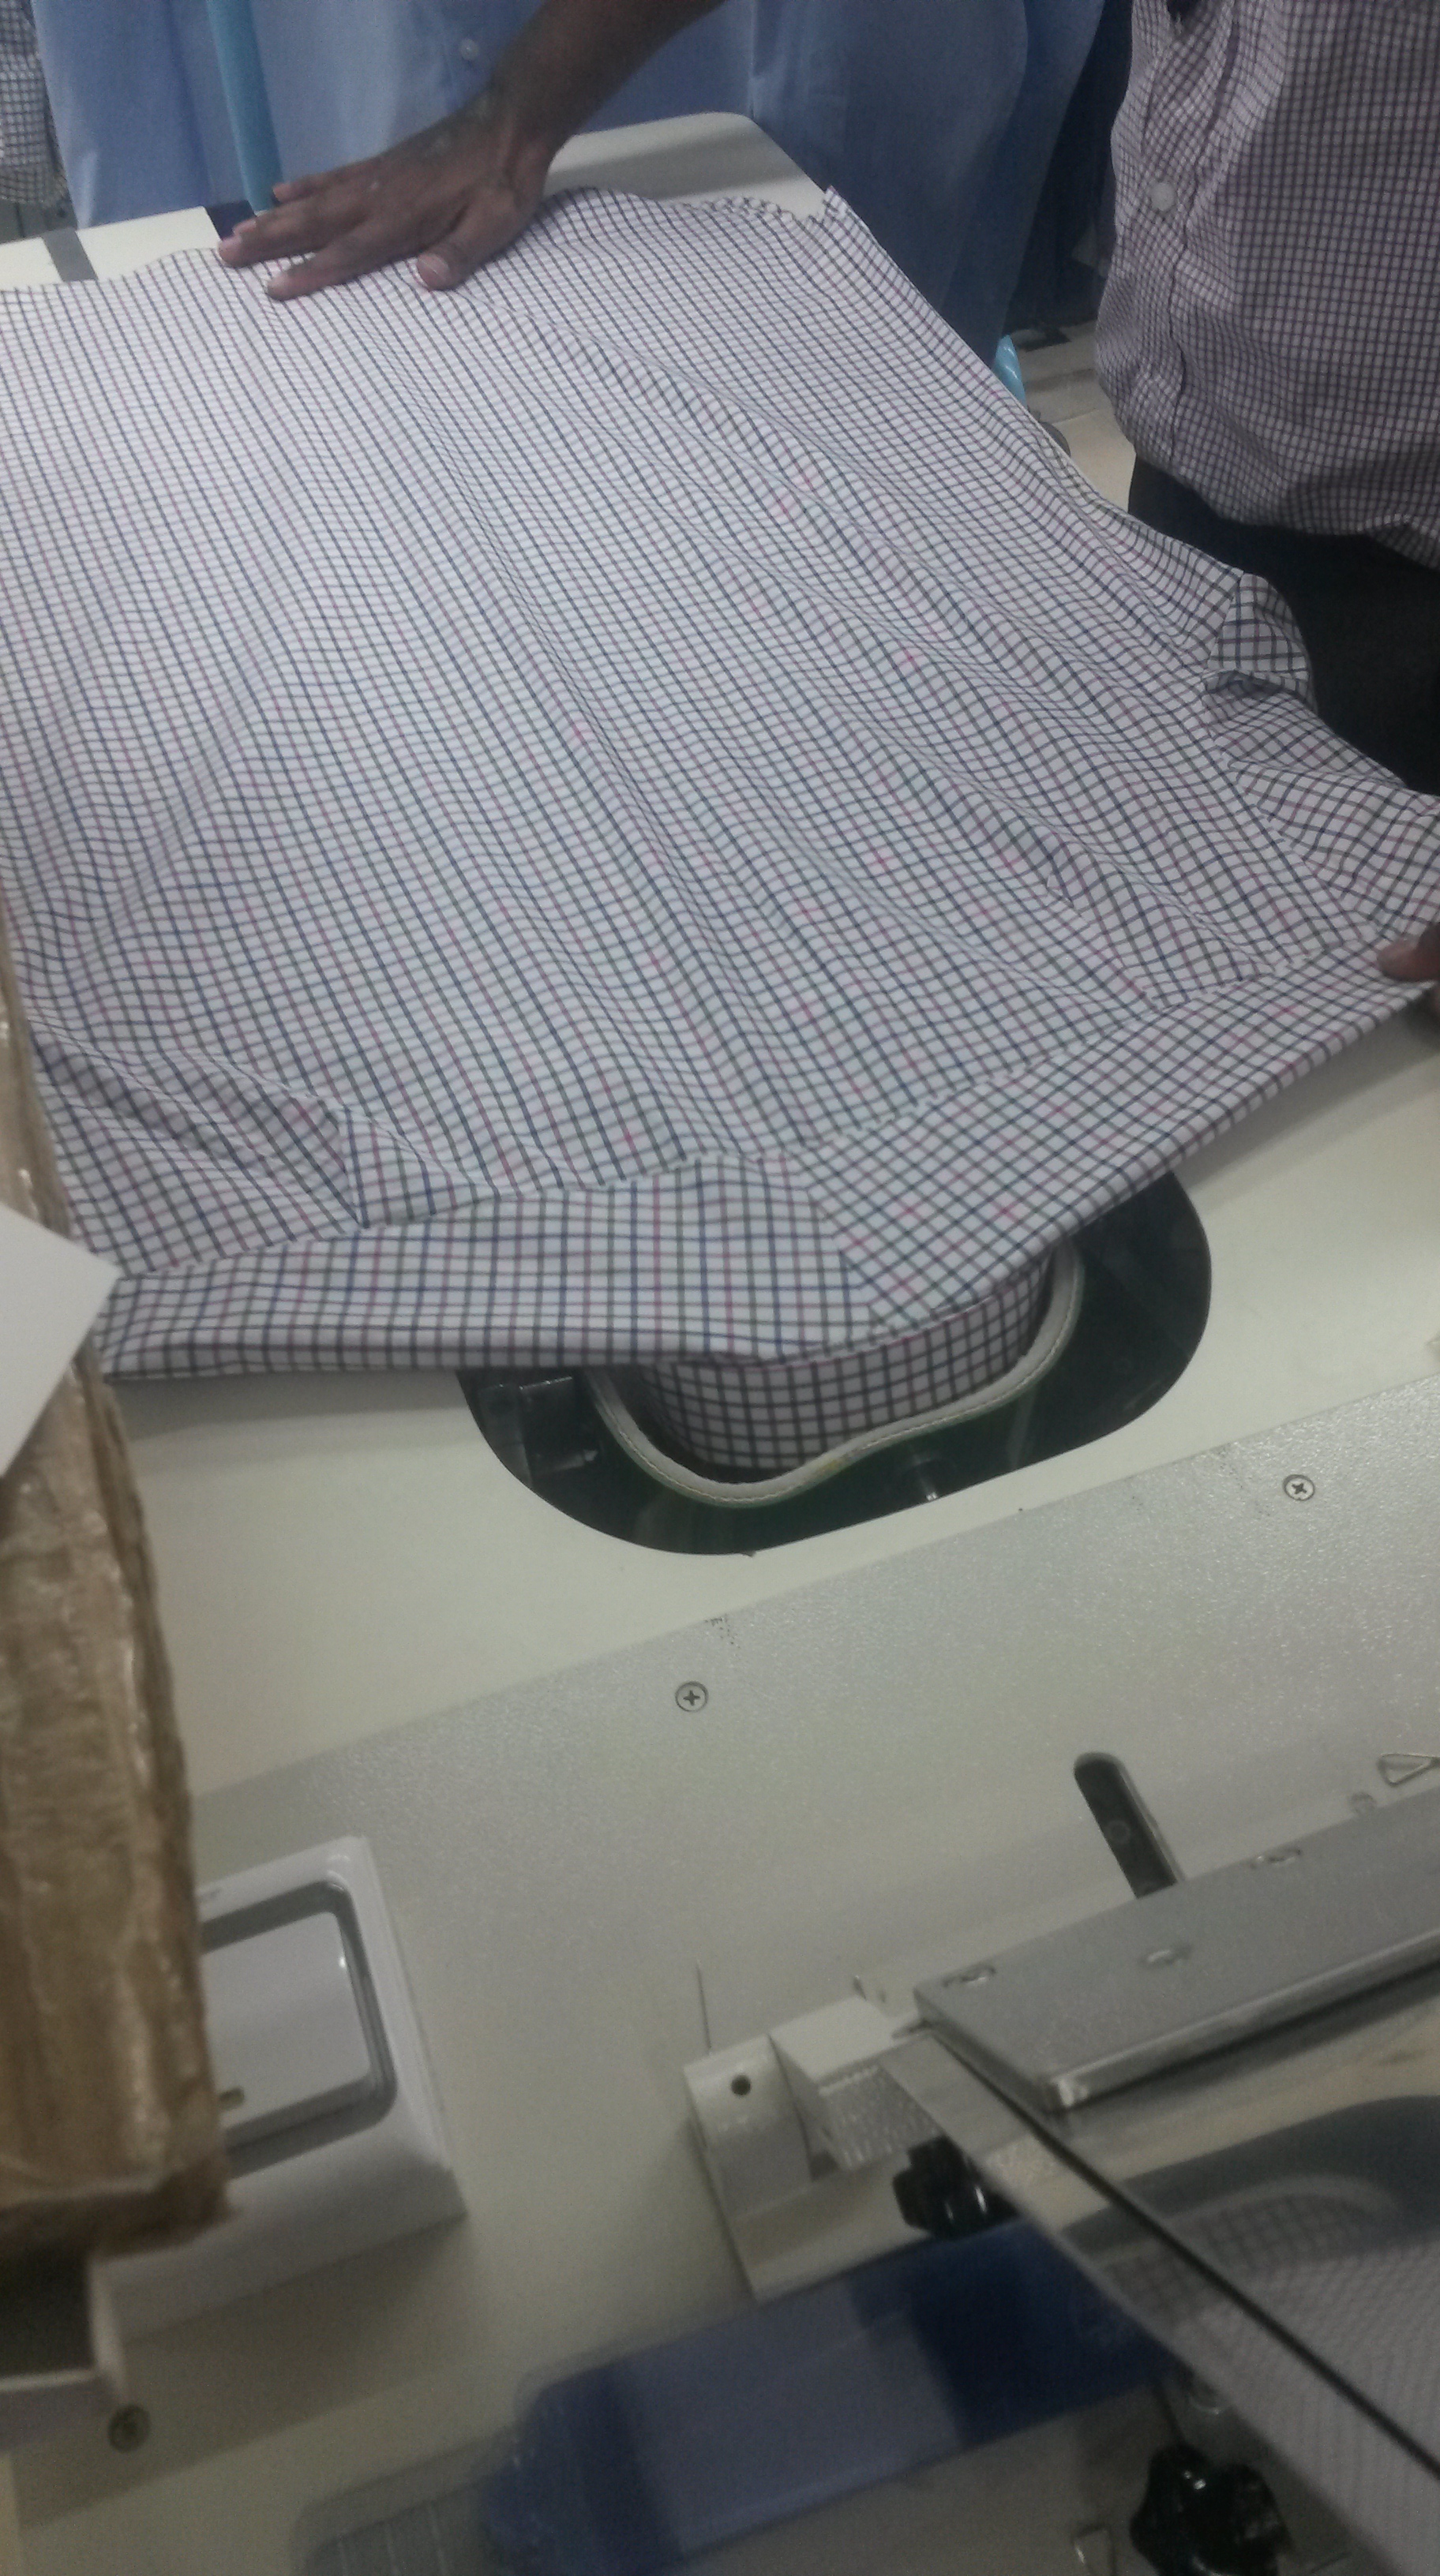
Step 7: Ironing
The assembled t-shirt is then manually ironed. The table used is a specialized one with a machine placed underneath that sucks in the air above it to create a pressure drop right above the table. This helps the shirt stick more firmly onto the table, making it easier to iron and remove all wrinkles.

Step 8: Packing
The shirts are folded and packed on specialized tables that have slots in them for the collar to make it easier to fold.

After the shirt is packed it is transported to shops where people like you and me buy them!
