I visited a gold plating factory, which coated various objects (from jewellery to statues) with gold. This was a very interesting application of Faraday’s Laws of Electrolysis (see my next post for more details on the theory).
There are three main reasons for electroplating:
- Electroplating with a relatively inert metal like gold ensures that the substrate lasts for a longer period of time, as the gold will not react with the air and wear away in the way that Iron, for instance, would.
- Electroplating with gold improves the conductivity of the substrate. This is much more cost effective than using the conducting material for the entire material, as gold is extremely expensive.
- Electroplating also improves the appearance of the product.
Step 1: Obtaining the substrate
The “substrate” refers to the raw material, or object that needs to be electroplated. These are made out of a range of materials, from brass to steel.

Step 2- Surface Preparation:
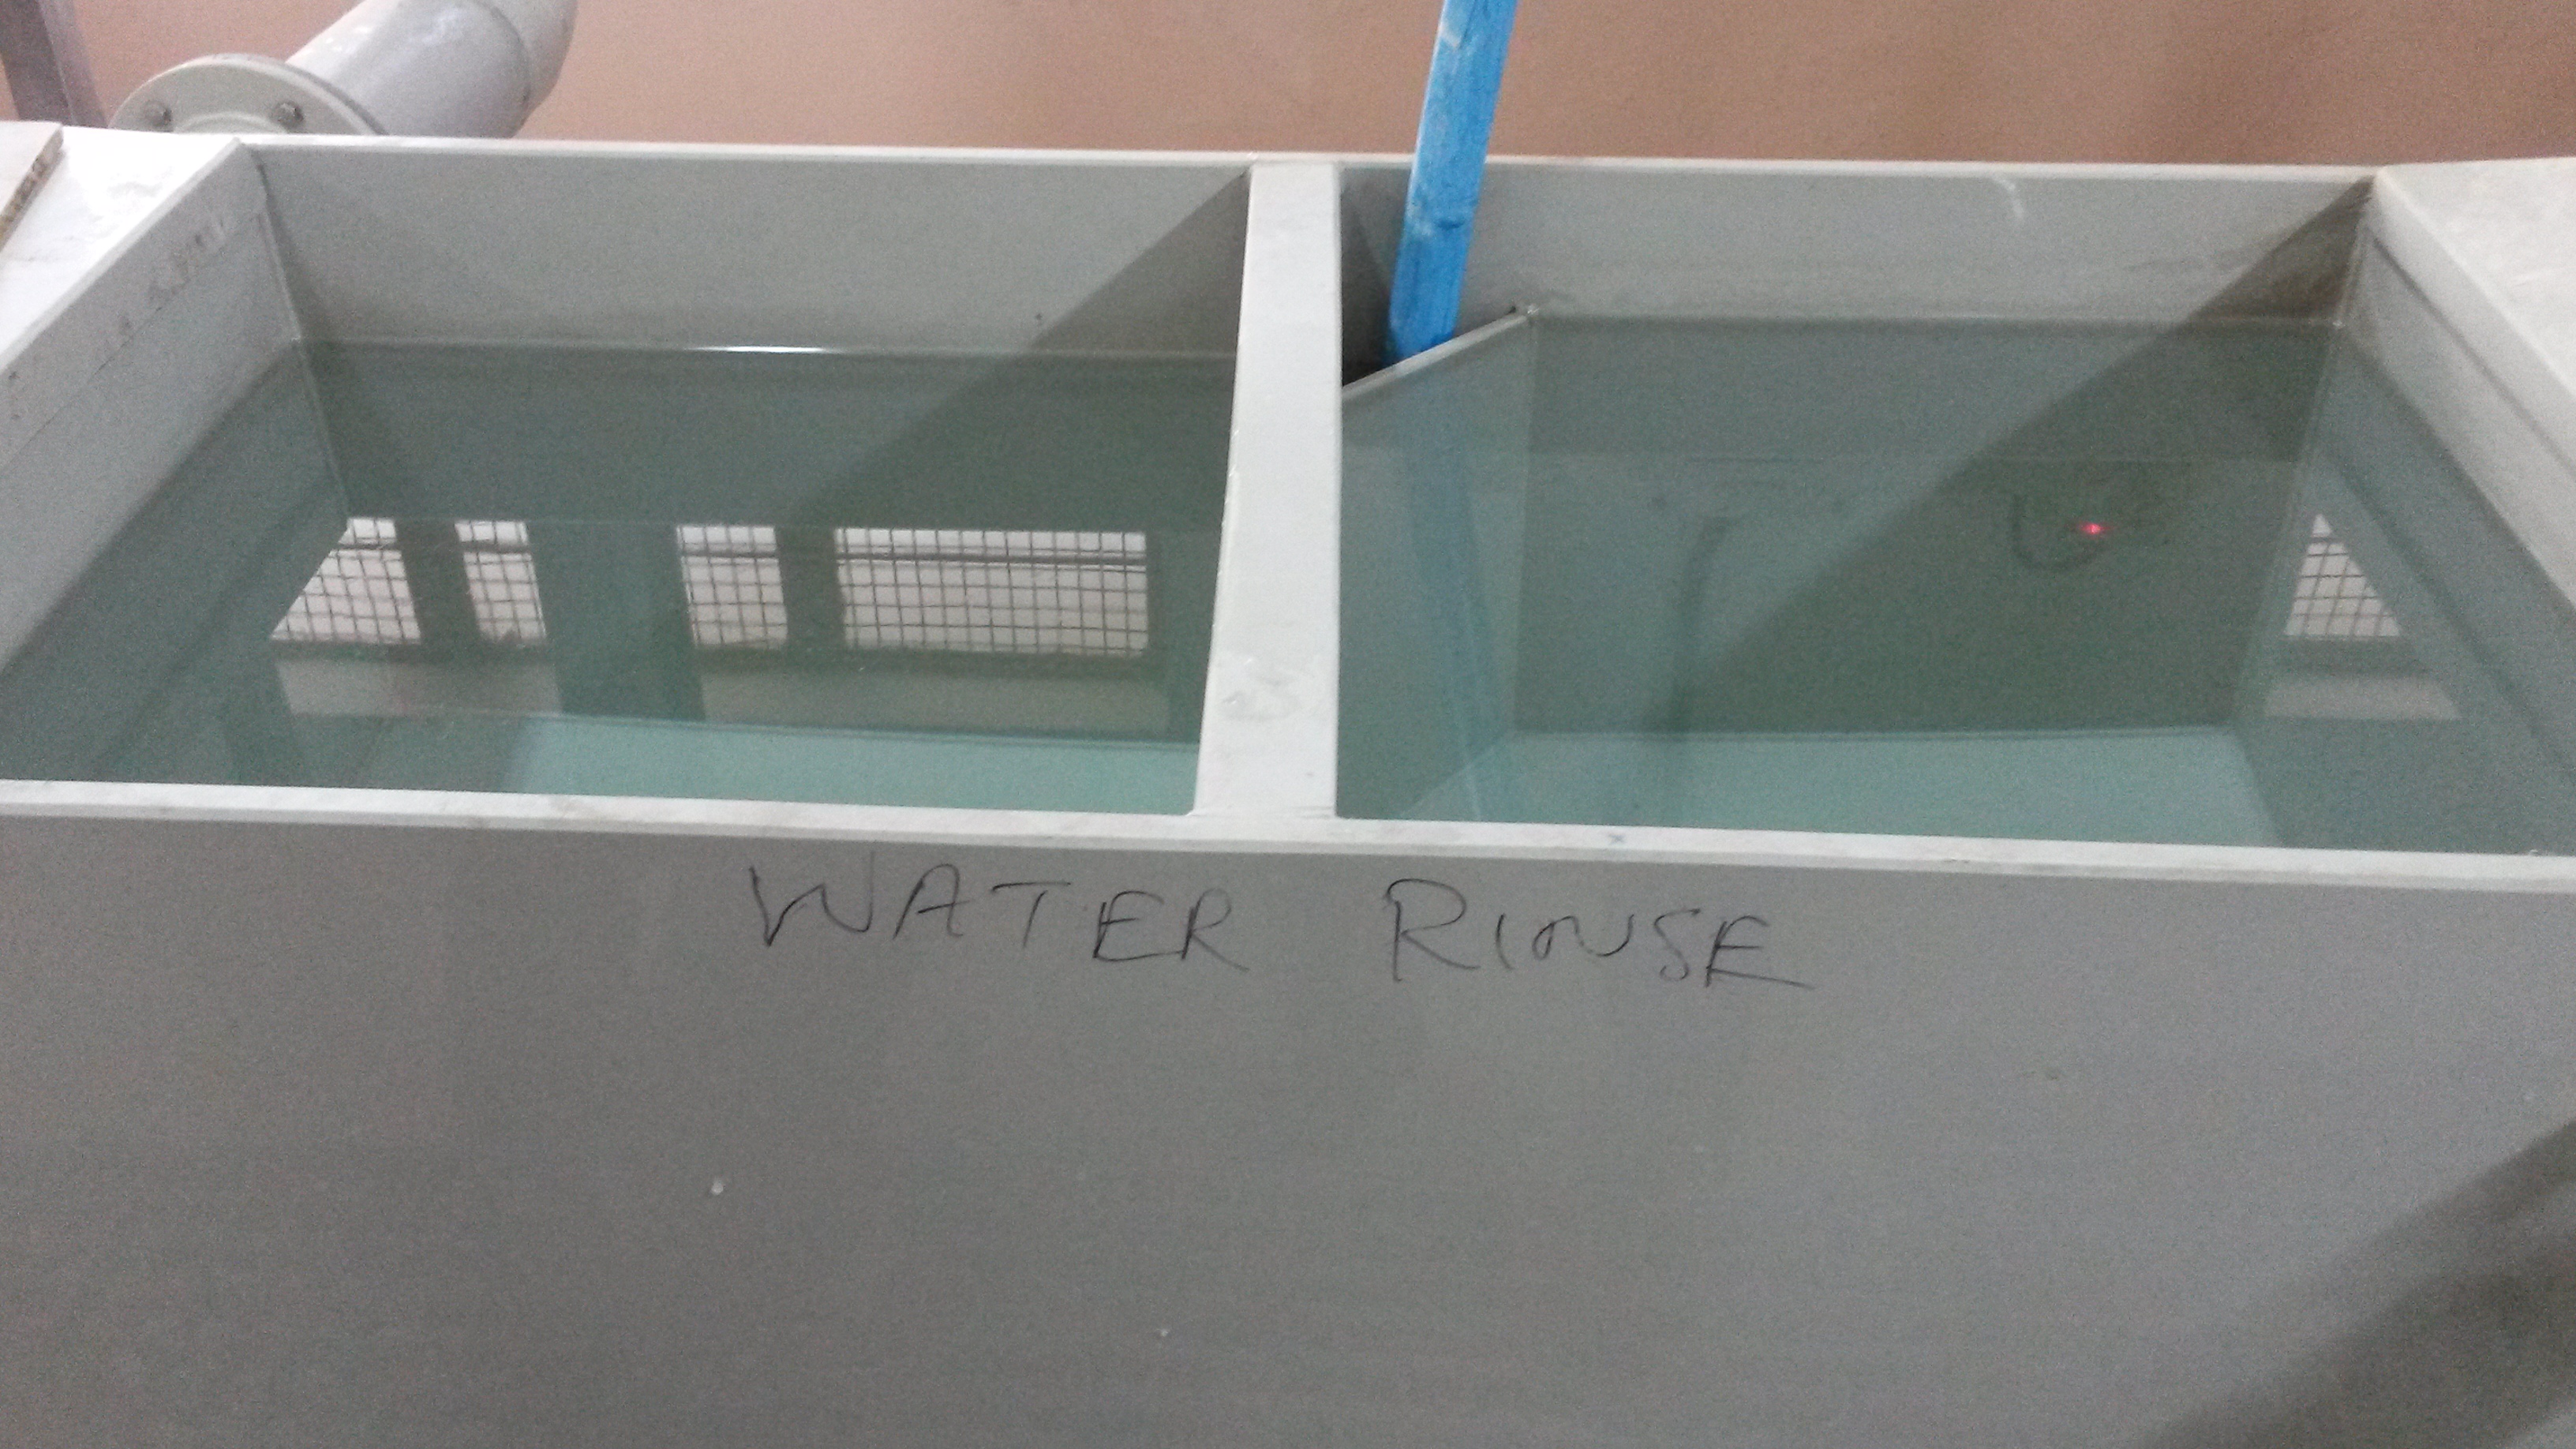
a) Water Rinse:
The substrate is first immersed in de-ionised water in order to remove any soluble impurities on the surface of the substrate. De-ionised water is, as its name indicates, water with its ions (such as Calcium) removed, i.e., it is pure H2O.
De-ionised water is more effective than normal tap water to clean the substrate as it is a better solvent. The charge in water molecules is separated, due to polarisation, to form a slight positive and negative pole in pure water. This dipole nature makes it easy for ions to dissolve in de-ionised water. In normal tap water on the other hand, previously dissolved ions reduce the polarity, making it less effective in dissolving more ions.

b) Ultrasonic Cleaning:
Ultrasonic Waves are waves with frequencies greater than 20,000 Hz (20 KHz). During Ultrasonic Cleaning, the substrate is immersed in water and ultrasonic waves are passed through the water, using the machine shown in the image.

Ultrasonic waves strike the surface of the substrate with high energy, making it an effective tool for displacing any microscopic dirt particles on the surface of the substrate. “Cavitation bubbles” are induced by the high frequency, which agitate the solvent. This then produces extremely high forces on any contaminants on the surface of the substrate. It also penetrates any cracks to remove dirt, oil, rust, grease, bacteria, and even fingerprints. The substrate is not allowed to rest on the bottom of the device during the process, because then part of the object will not have sufficient exposure to the solvent.
c) Acid Bath
Next, the substrate is immersed in extremely diluted sulphuric acid. This dissolves any surface impurities that are not soluble in water. The acid is diluted to ensure that it does not react with the substrate itself (to prevent corrosion).

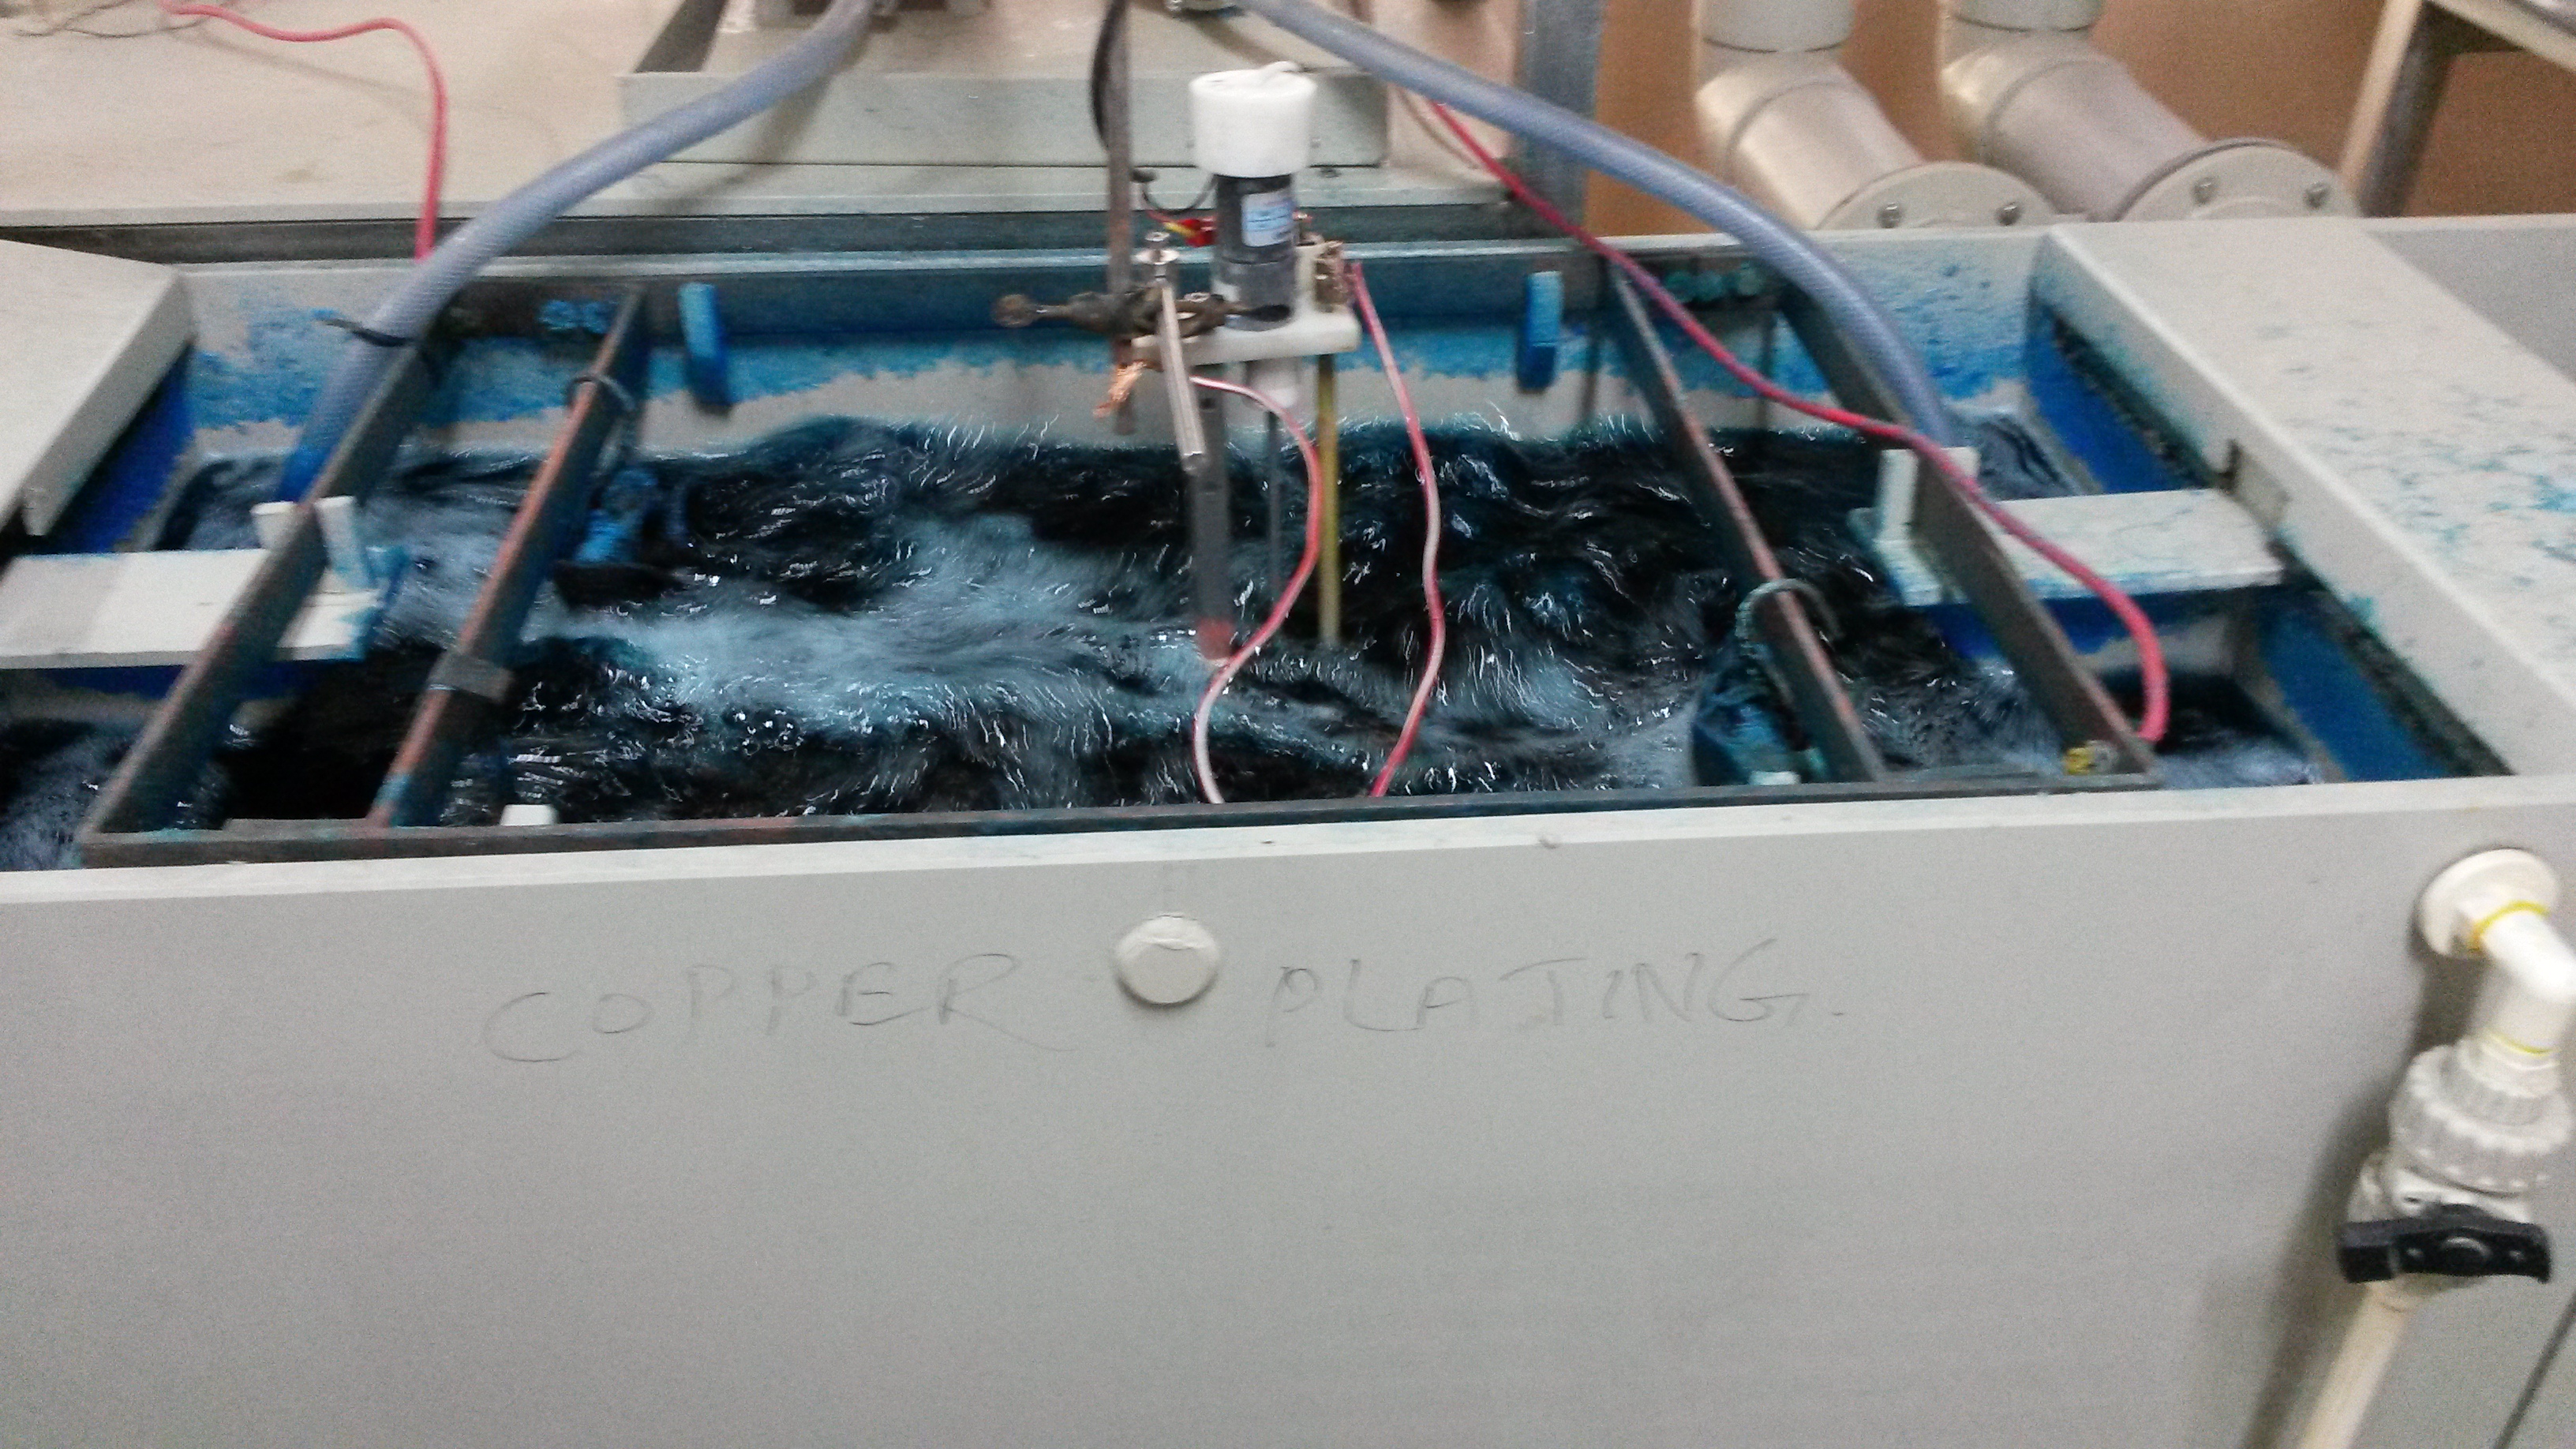
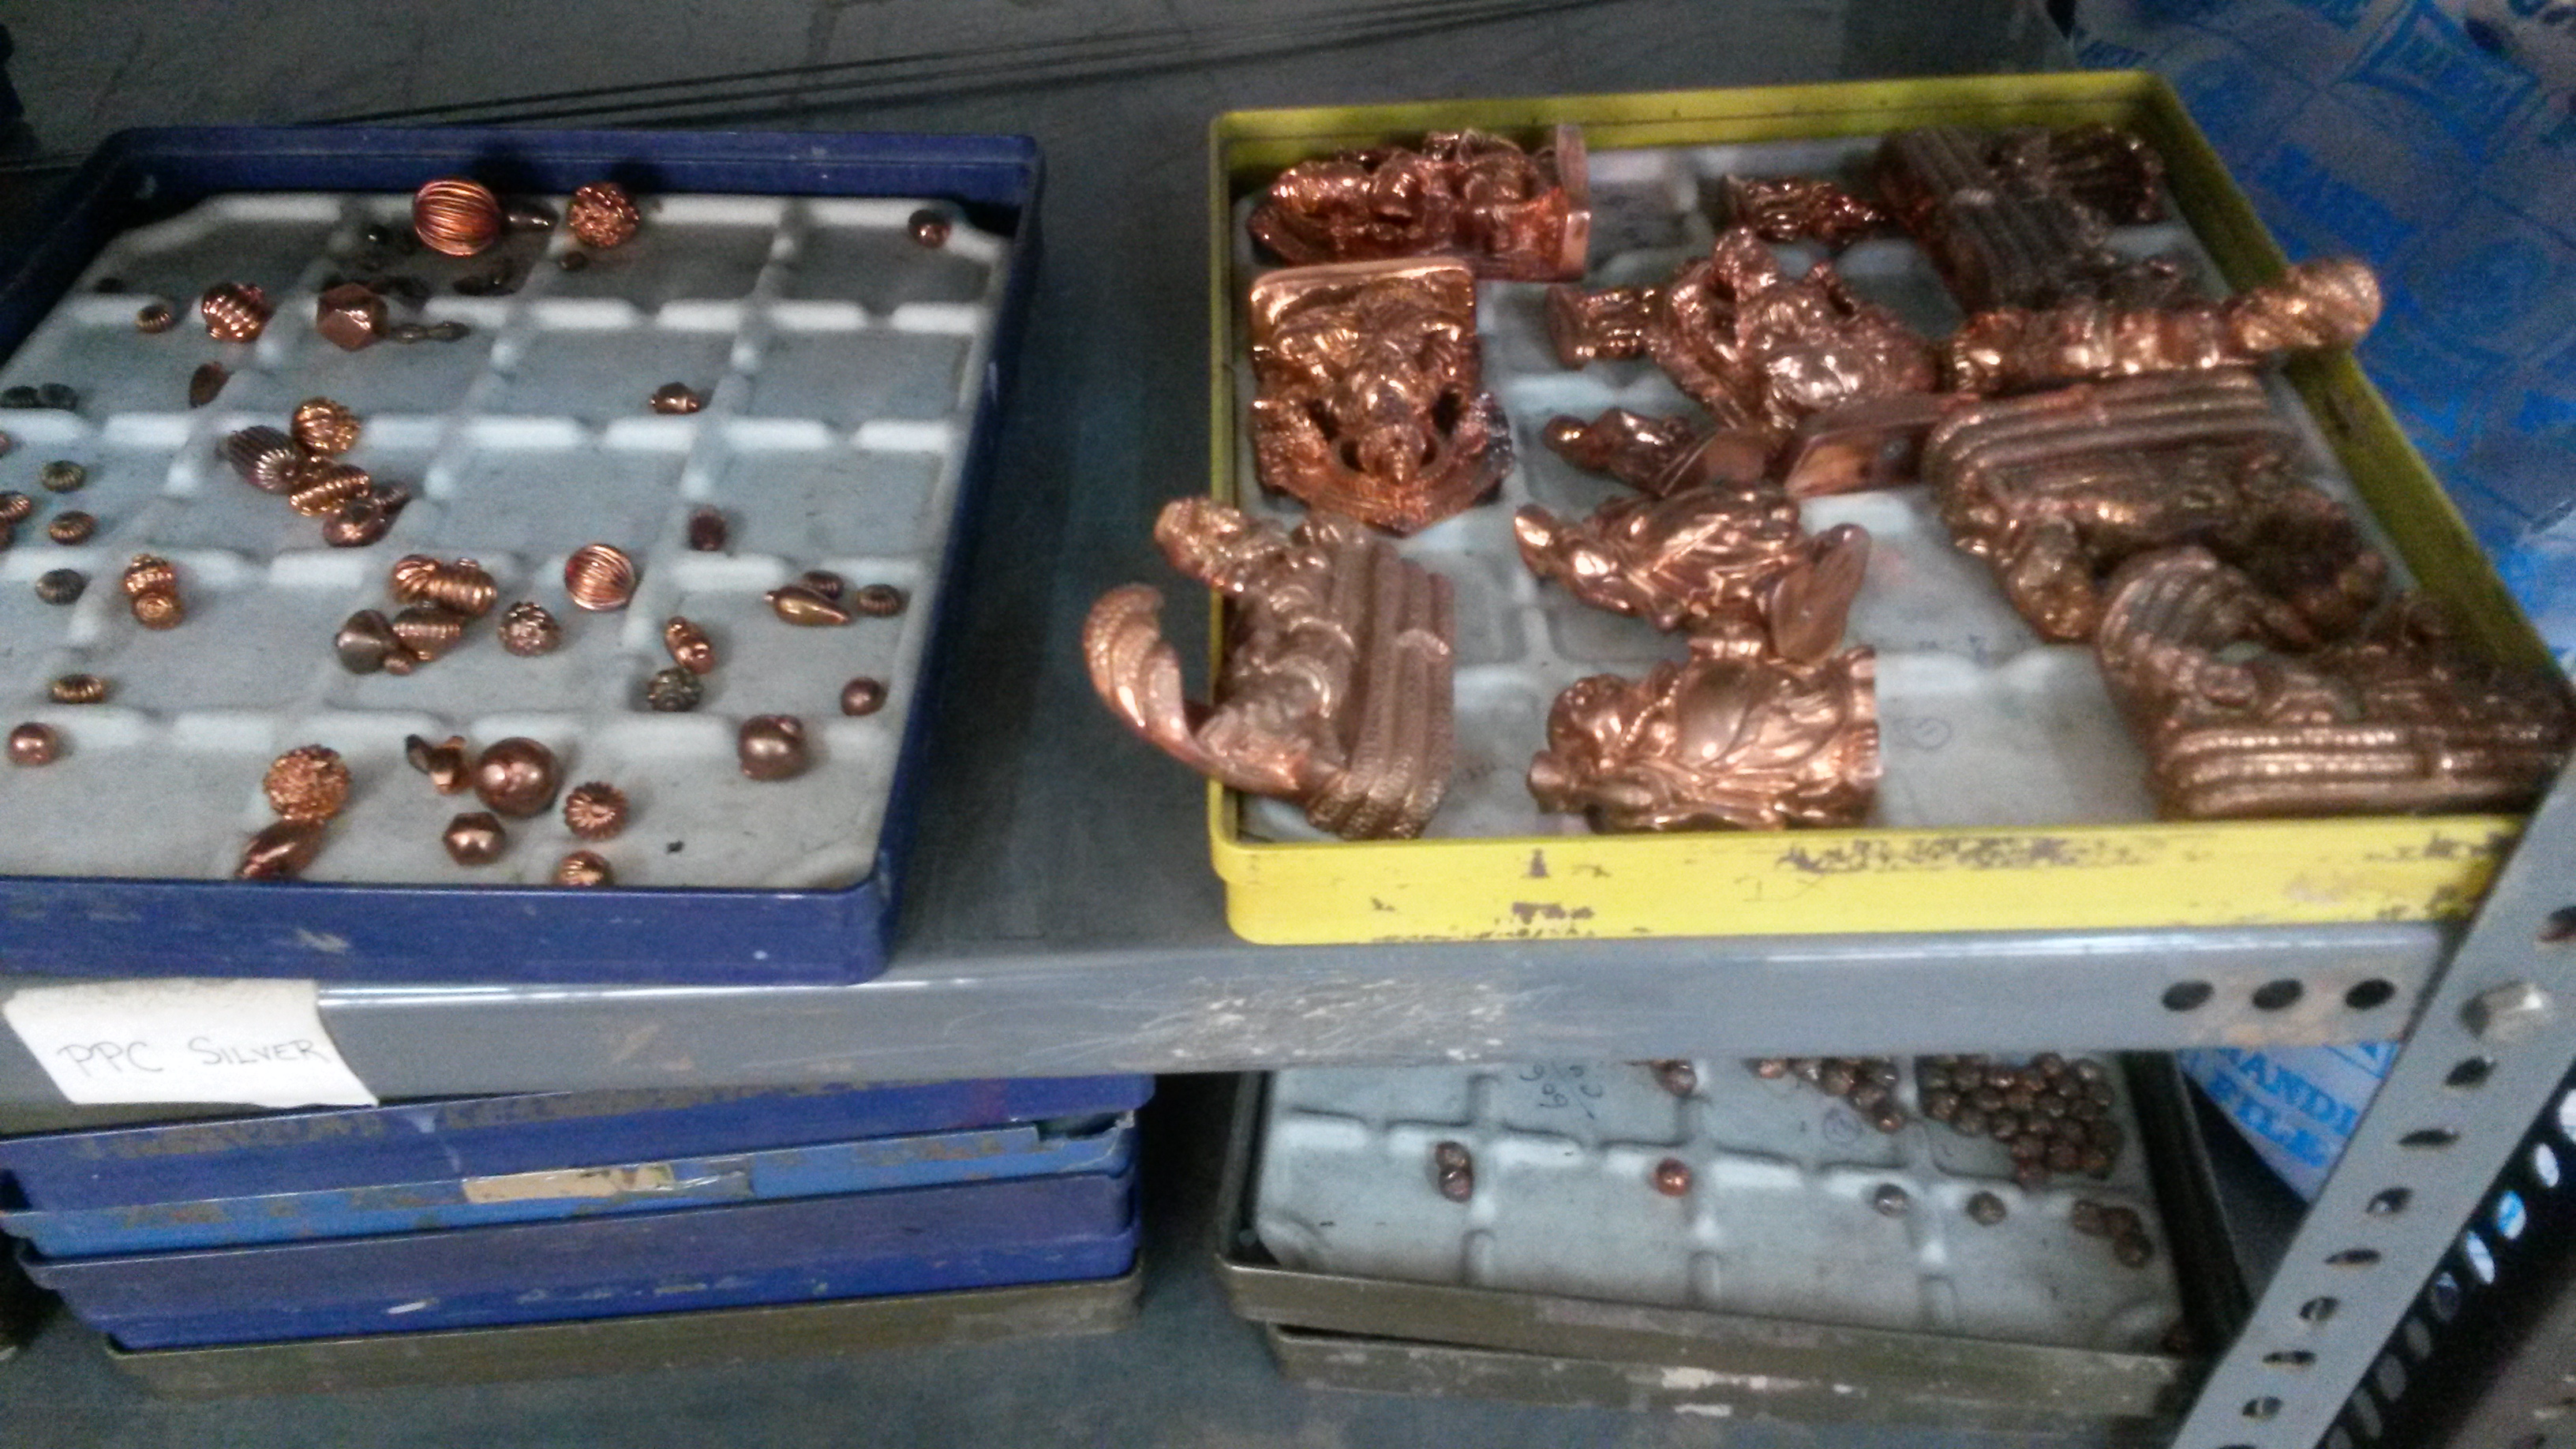
d) Copper Plating
The last step of the surface preparation is copper/ nickel plating. Please see the theory post for details on reactions at the cathode and anode that enable this to occur.
The substrate is plated with copper for the following reasons:
- Copper increase the conductivity of the surface allowing for more efficient electroplating.
- Copper Plating makes the surface smooth, allowing for an even coating when it is finally electroplated.
- Copper Plating also makes the surface bright, as the image below shows, making the final product have a greater aesthetic value.

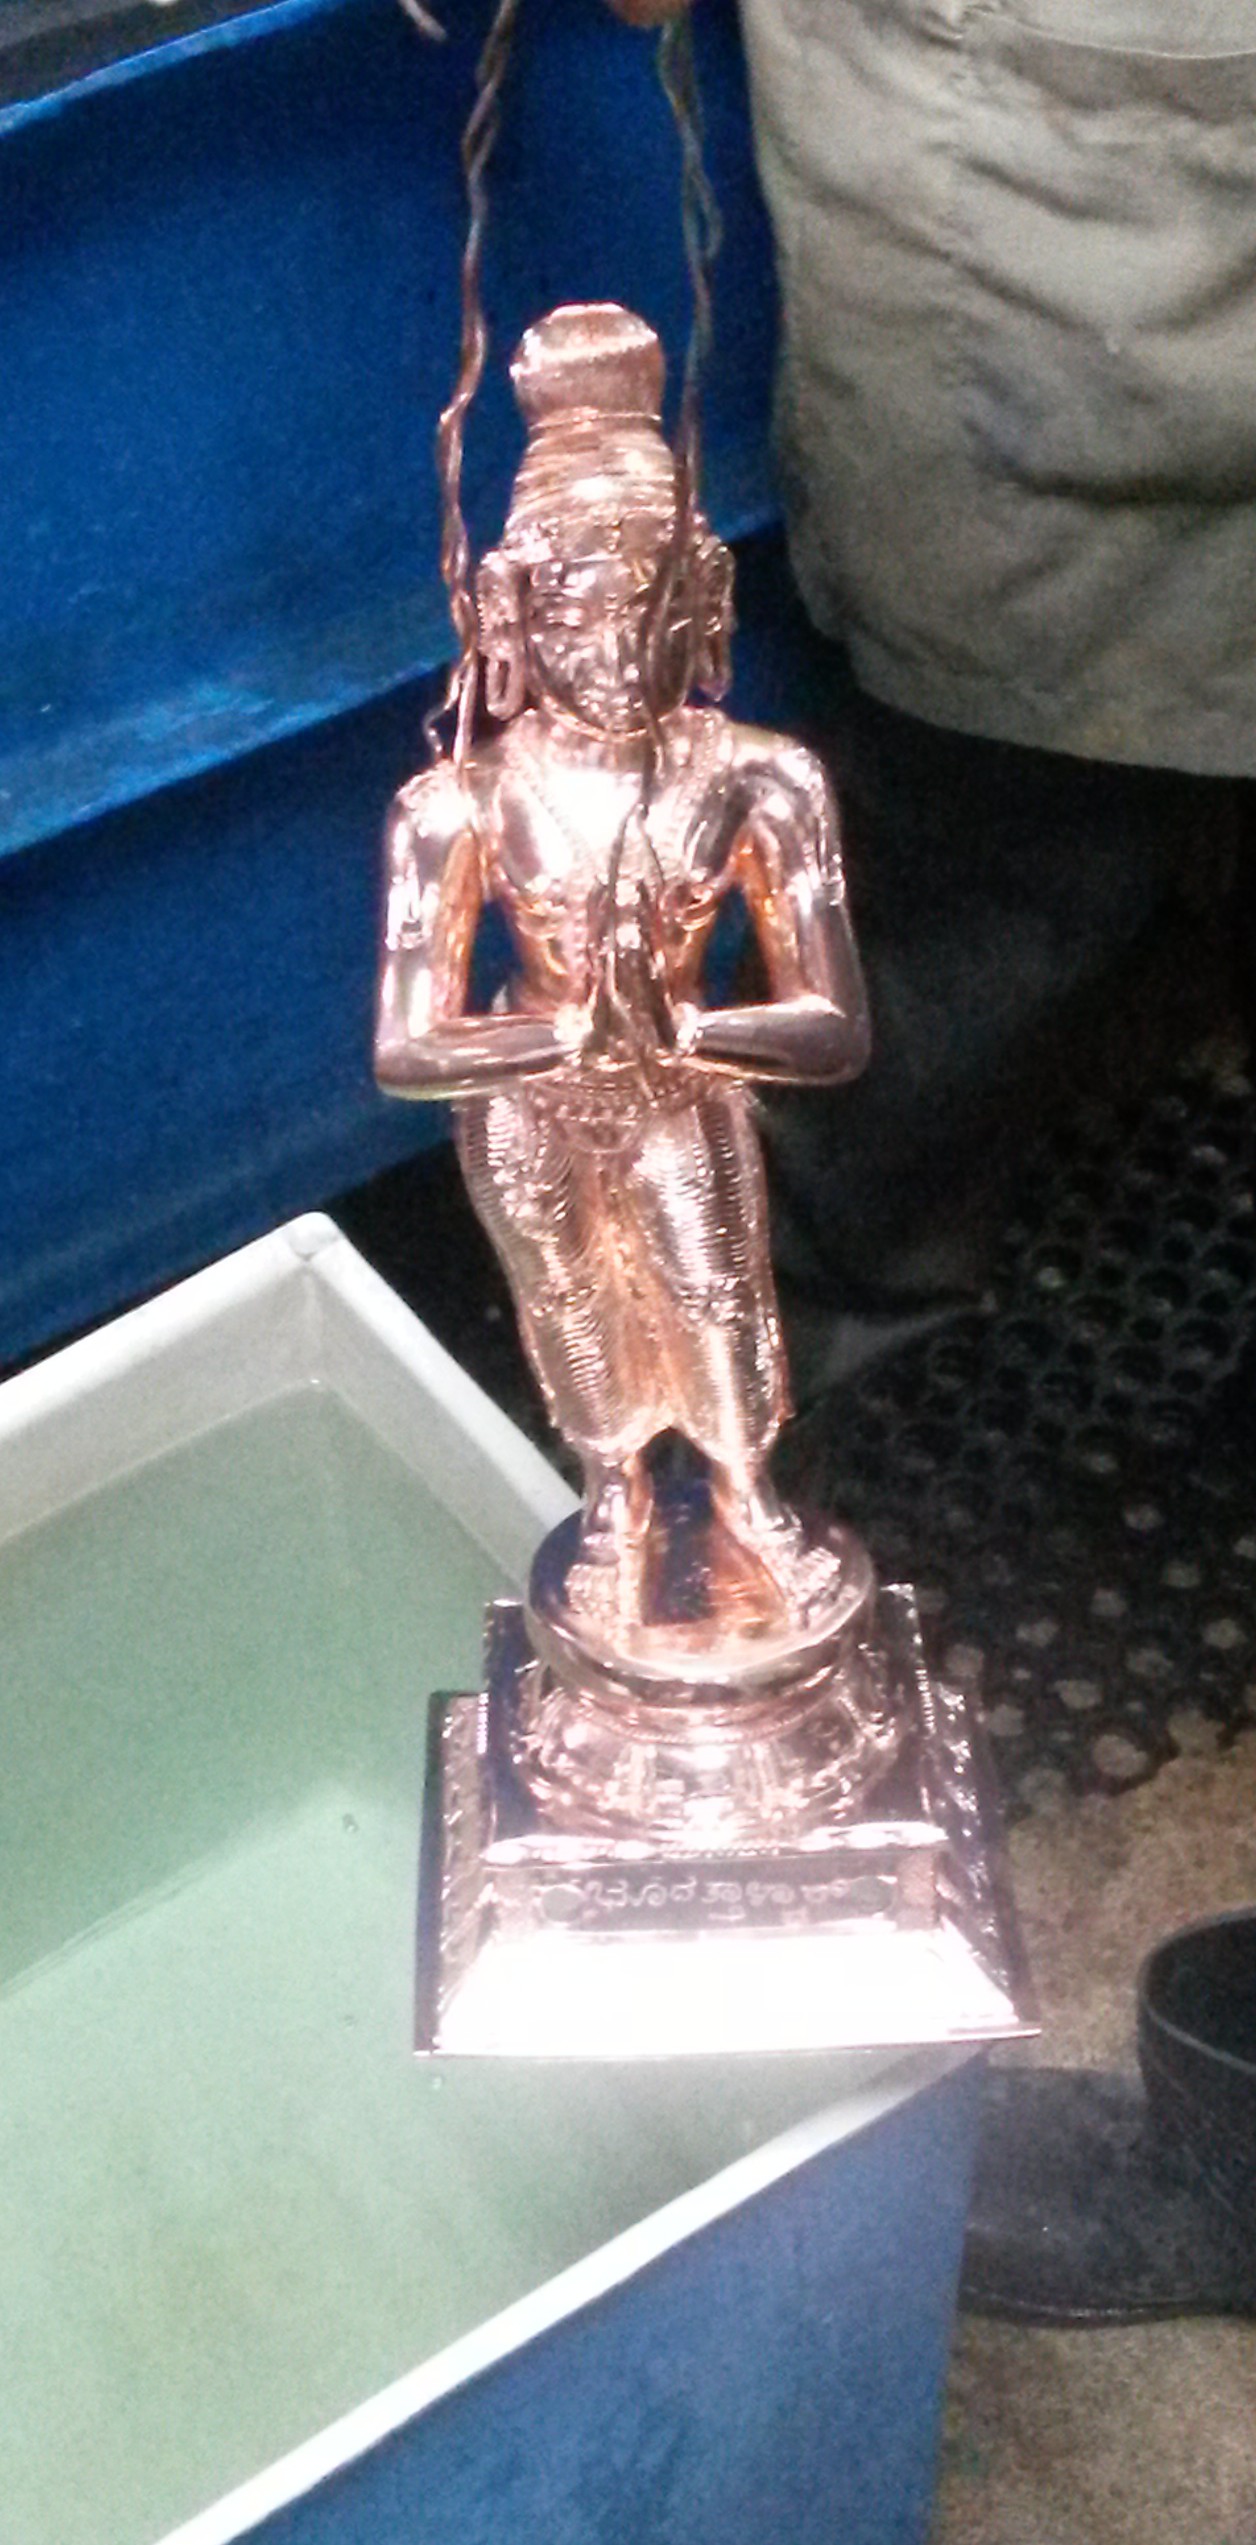
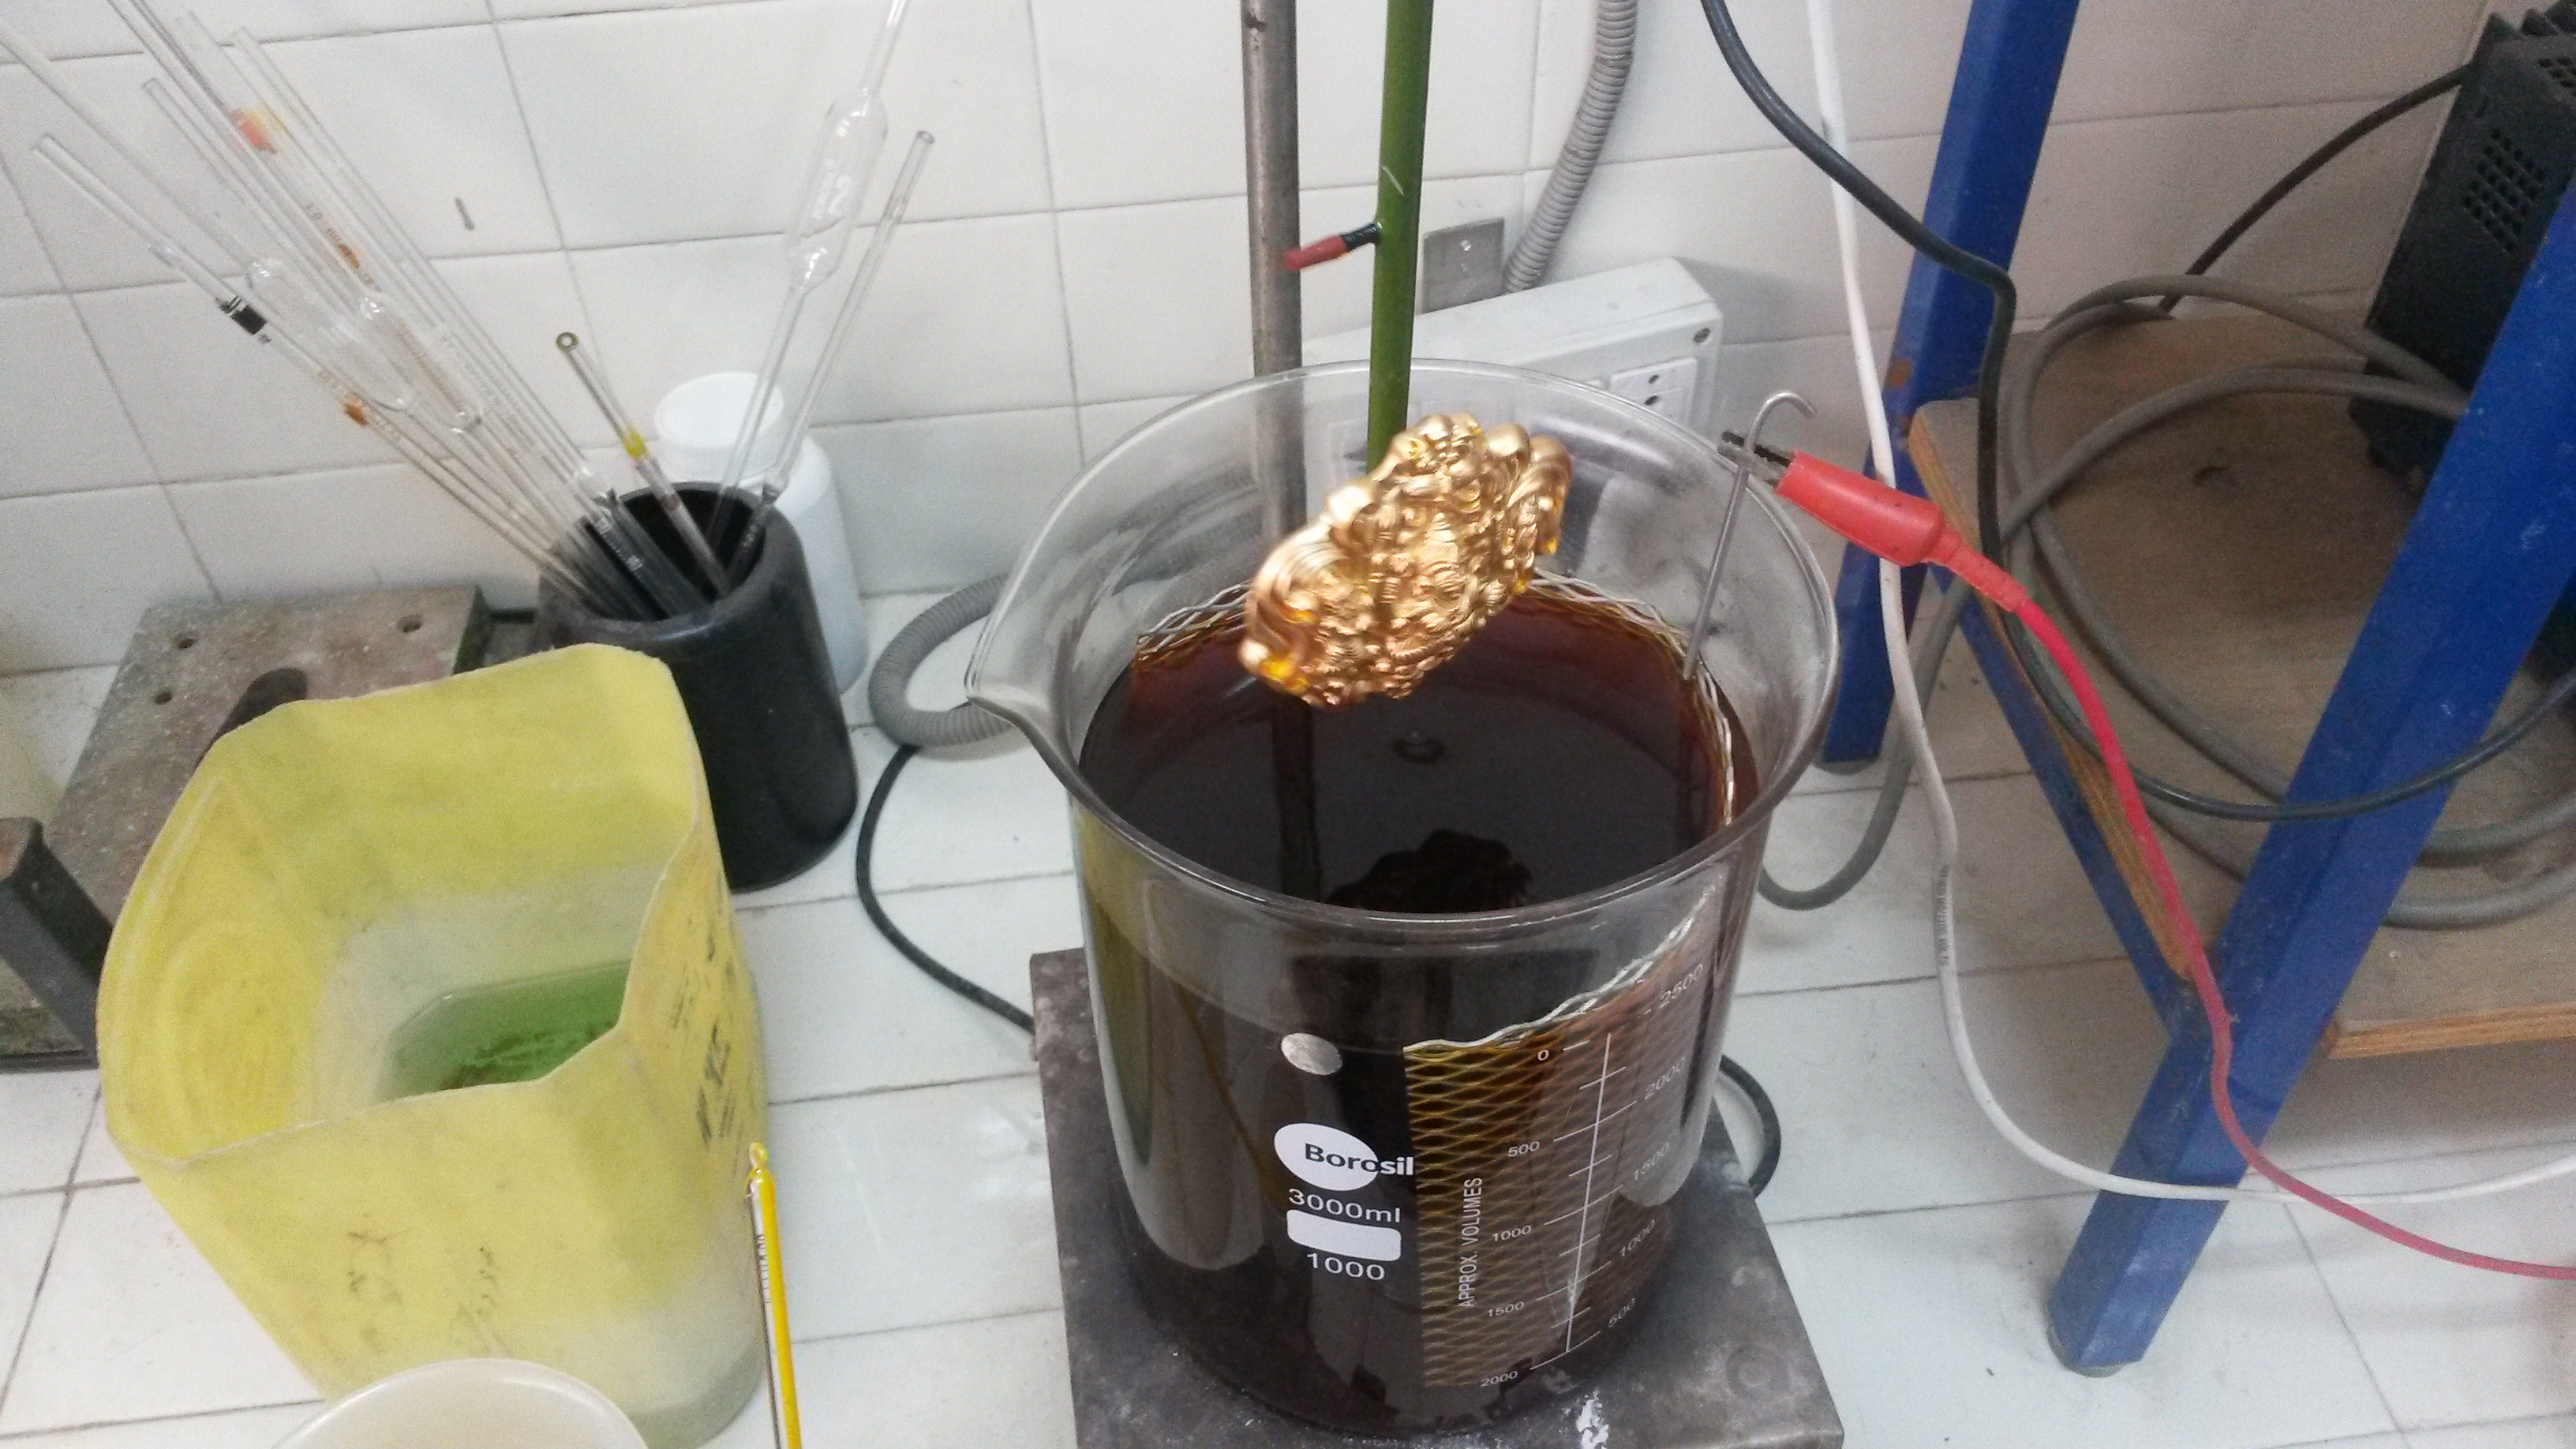
Step 3- Gold Electroplating:
In a similar process to which the substrate was electroplated with copper, it is now electroplated with gold to form the final product. Please see the theory post for details of the reactions.
The substrate is continuously rotated to ensure that an even coating of gold results. This, and the final product, are shown below: